
1:144 scale lavender bush
Idea and instructions by Anna-Carin Betzén
These instructions can be used in several small scales, as you're working from an in-scale sketch rather than fixed measurements. Please visit my garden center for an overview of all my free flower DIYs and other files about making flowers.
For 1:120 and N (1:160) scale, you can use the supplies listed below. They'll probably work for H0 (1:87) too. 1:48 scale lavender should have thicker stems, which would make them too heavy for the method described here. The flower supplies page has more information on supplies you can use.
Supplies and tools
- Woodland Scenics' "Field grass", green
- Tacky glue
- Scissors
- Small zip-lock bag or other non-stick surface
- Toothpick
- Reverse tweezers
- Lavender craft paint (perhaps green too)
- Lavender Nu-foam or flocking (optional)
- Paintbrushes (flat synthetic brush and large, soft brush)
- In-scale reference sketch cut from the Flower size reference sheet
Lavender bush
Read all instructions before starting, as you need to do the first few steps while the glue is still wet.
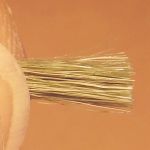
Take a small bundle of field grass fibers, fold in half and cut straight off.
Turn the bundle over so you're holding the cut end, and cut off a short piece. Discard the rest, or you'll have little bits of field grass all over the place.
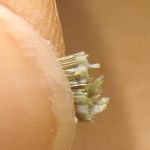
Work some glue into the cut ends...
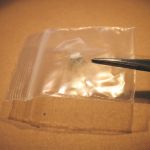
... put a drop of glue on the zip-lock bag...
... and stick the bundle in the glue.
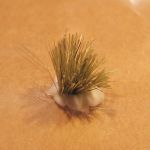
While the glue is wet, poke the bundle with a toothpick to spread out the fibres.
I should probably have used a slightly smaller bundle - the bush doesn't have to be this dense.
While the glue dries, repetedly check how your lavender is doing. The fibres tend to obey gravity, and continue shifting downwards, which may be very well if a heavy rain just passed your garden...
If the fibers tends to spread out too much, reverse gravity by suspending the zip-lock bag upside down using reverse tweezers (place them on a book to raise the bag off your work surface). Check again a little later - if the fibers sit too straight now, then turn it right side up again. And so on.
Don't proceed until all the glue has dried clear.
At some point, the bush will probably peel off the bag. In that case, glue it to a toothpick for ease of handling.
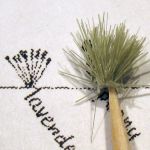
Compare your bush to the sketch. If it's too tall, trim it with scissors.
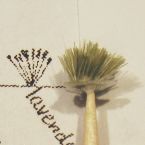
That's more like it!
If you think the green is the wrong shade, take a tiny bit of green paint on a firm paintbrush and paint the bush, trying not to clog it with paint (I didn't paint it this time, but the one in my English cottage garden is painted).
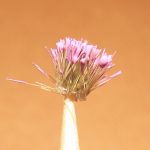
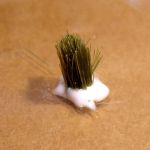
Apply lavender paint to the tips (preferably a little less than shown, so the fibres don't stick together)...
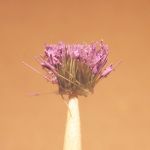
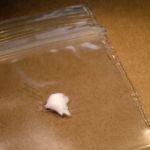
... and apply Nu-foam with a soft brush. (Or dip it - but if the foam is in a bag, using a brush is easier.)
You can skip the foam if you don't have any, but close up it looks better with foam. (Flocking works too, but Nu-foam is better.)
Let the paint dry, then blow on the bush to remove excess foam.
Trim off excess glue around the base.
Remove the toothpick and glue the bush into the setting.