
Flower-making supplies
Idea and instructions by Anna-Carin Betzén
Flower-making supplies come in many different textures. Click on this photo for a closeup, and you'll see what I mean! Use a few different supplies in the same setting for a more varied look, and a better imitation of reality.
If you're on a budget, the Dye-It-Yourself section will be especially useful, and also the section on sand. Thanks to paint, a small set of supplies can provide you with flower materials in all colors you'll ever want. When buying flower material, color mixed bags give great value for money.
For model railroad landscaping, you may want to use the same types of greenery for flowers as you do for the rest of the landscape, for a consistent look.
Please visit my garden center for an overview of all my free flower DIYs and other files about making flowers.
This page covers:
- Flowers
- Soft flowers (foam)
- Crunchy flowers
- Sand etc
- Other
- Greenery
- Stems
- Ground foam
- Cut or punched paper
- Natural materials
- Other
- Dye-It-Yourself
- Where to find supplies
Flower-making supplies
The photos of supplies are 1/2" square in real life - i.e. about 60 cm (2 ft) in 1:48 scale or 180 cm (6 ft) in 1:144 scale.
For most photos I've dipped about 3 mm (1/8") of wire in glue and then in the material shown, to show what a 1:48 scale flowerhead would look like. The photos also show the size of the individual bits of material.
Take a close look at your own supplies, picking out individual bits and perhaps creating flowerheads, then compare them to flowers in your preferred scale on the example sheet to get an idea of what flowers your supplies can be used for in that scale.
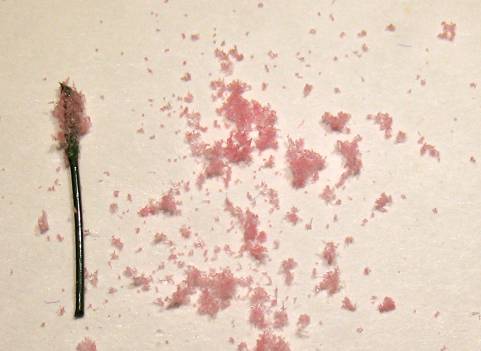
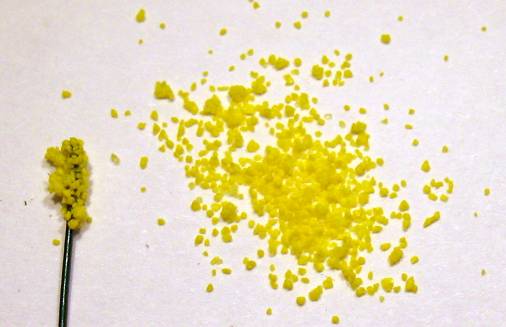
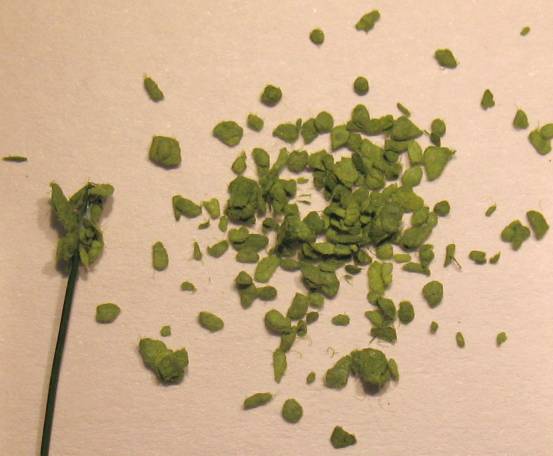
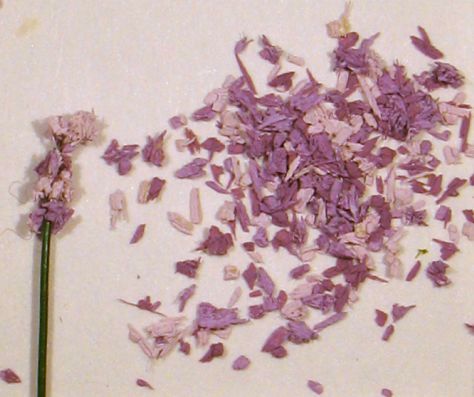
Soft flowers (foam)
Ground (or shredded) foam is usually soft. It can be finely or coarsely ground. Also, if the original foam had large bubbles, the ground foam will look different than if the bubbles were small.
(Woodland Scenics)
(Kitz!)
(Kitz!)

(Ladybug)
Ground foam is good for representing flowerheads made up of lots of tiny flowers with petals pointing in all directions. For example:
- Finely ground foam - dip a wire in glue, then in foam. It's not "massive" enough for sprinkling over greenery; it would just look like a dusting of petals. Great for delphinium etc in scales where Nu-foam looks too skinny. If you need a different color, you can dye it - see the Dye-It-Yourself section below.
- For 1:144 and similar, use Nu-foam instead of finely ground foam, as it's even finer, almost like a powder. It's static and clings together, so it's hard to show just how fine it is. If the color of the stem shows through the foam, try using paint or a paint/glue mix instead of glue.
- Coarsely ground foam - glue the lumps in place individually, or sprinkle on a flowerbed.
- Color mix - sprinkle on for a mix of different flowers in a flowerbed. If used for vines and flowerheads, a realistic effect will be best achieved by picking out pieces of the same color (in real life, each plant tends to have flowers of a single color). That means a bit more work than using single-colored foam, but on the other hand you get multiple colors at the price of one.
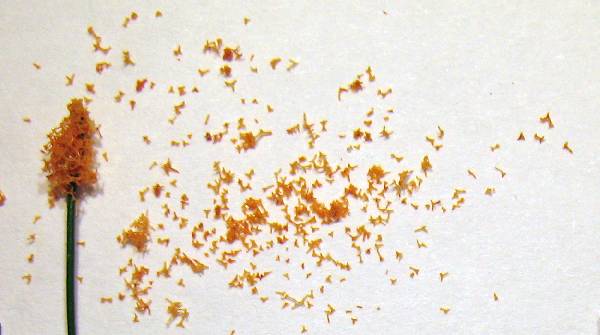
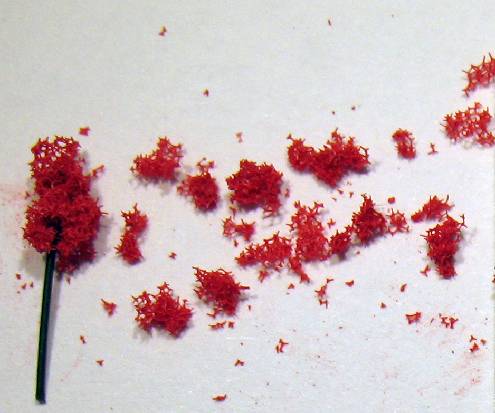
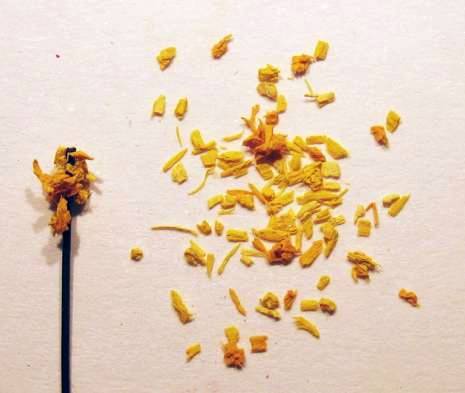
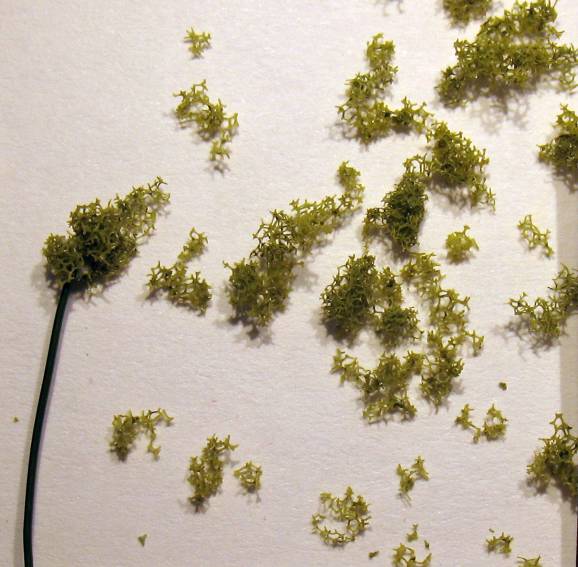
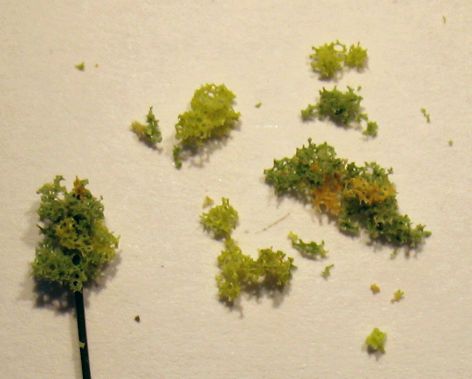
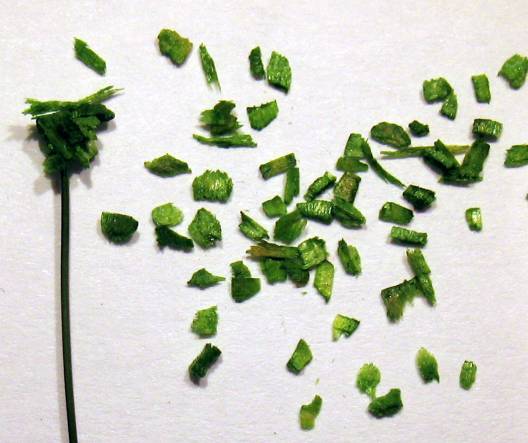
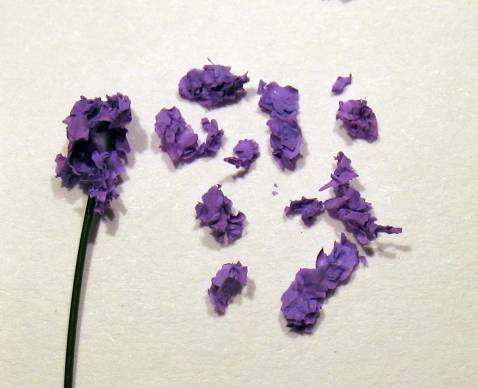
Crunchy flowers
Crunchy flowers are essentially ground Styrofoam that has been dyed.
Quality varies. The ones I've bought have all been packaged in umarked ziplock bags so I suspect they're produced in small quantities by a number of makers.

(Bill Lankford)

(Ladybug)
- Can often be used individually for single flowers - depending on scale, it might be peonies, roses, or much smaller flowers.
- You have to pick out useful bits one by one, as the shapes vary.
- Often you get three matching shades in the same bag.
- Bill Lankford provides an excellent product that is thoroughly dyed, and the bits are smaller and more evenly sized than in some other products.
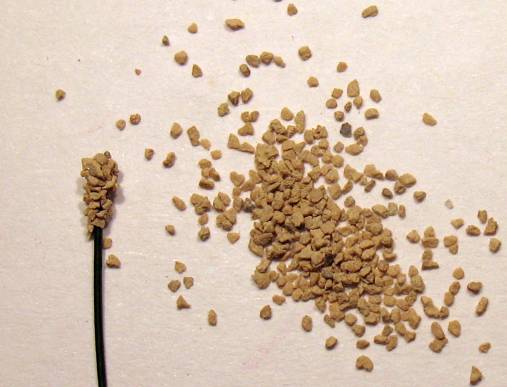
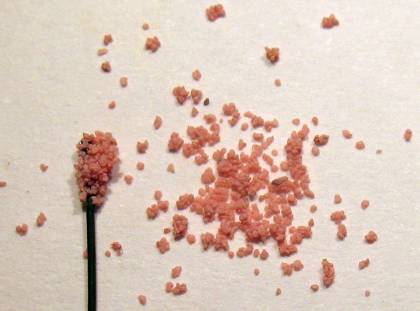
Sand etc
Sand can be used for flowerheads, but usually it needs to be painted afterwards.
If you can find colored sand that is made up of finely ground plastic, it's great for really tiny flowers. Avoid dyed natural sand, which doesn't have enough color to be used in miniature (and, the color comes off very easily). I read that Crayola has colored sand that can be used in fish tanks - it may be worth checking out, but apparently it's sold in sandbox quantities.
(Woodland Scenics)
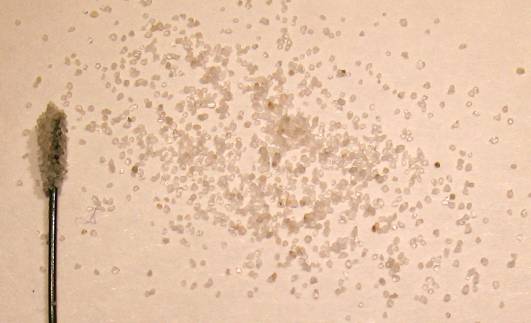

(Kitz!)
(Platignum, discontinued product)
- Sand or no-hole beads - for "solid" looking flowerheads like lupines, hyacinths etc. Dip wire in glue, then in sand, and paint when dry. Drybrush with a slightly lighter color afterwards.
- Colored sand - for flowerheads as above, or sprinkle on for tiny individual flowers, or use it for the centers of larger-scale flowers.
Other
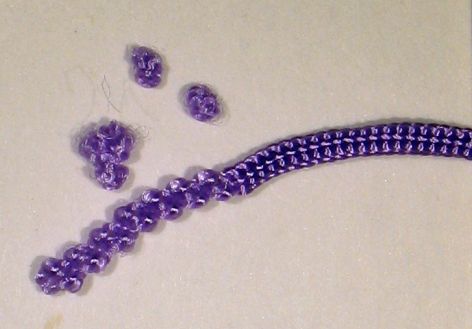
Further supplies you could use include flocking (used for "velvet" seats on small-scale miniature chairs, car model seats etc) and dyed sawdust (sometimes sold as a craft item or cheap way of making model RR flowers). I've also used unravelled bunka cord.
- Sawdust - as the bits are irregular in shape, sawdust look its best when used by the bunch (as leaves or flowerheads) rather than speck by speck.
- Flocking - mostly for adding texture to e.g. the center of flowers. Apply it with matching paint (or paint/glue mix) for best effect, not with glue. Otherwise the surface underneath will show through.
- Bunka - for 1:48 scale roses, you can snip off a little bit and roll it up between your fingers. It might work for wisteria or lilacs too, but I find it a little too shiny, and the larger the flower, the more obvious the shine is.
Greenery
Stems
Most flowers need stems. Here are some suggestions.
(Woodland Scenics)

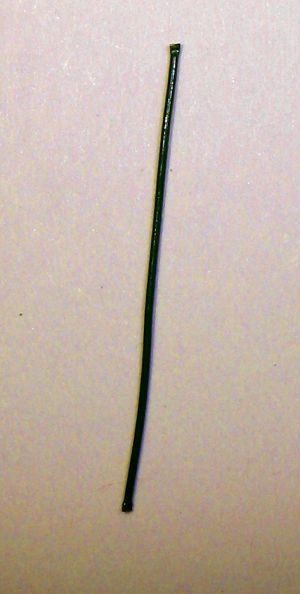
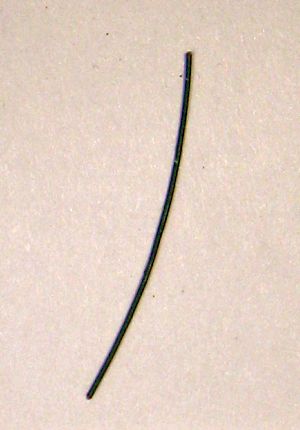
- Thin floral wire - the only thin green wire that is widely available. Unfortunately, it's a bit thick for flower stems (even in 1:48 scale).
- Home-painted wire - use a suitable thickness of wire and coat it with green craft paint.
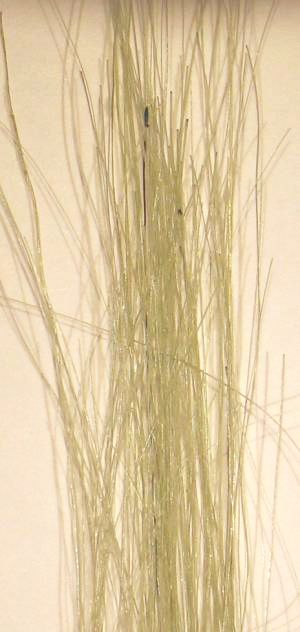
- Field grass - perfect for a bunch of really thin stems, like small scale lavender, or tall grass. It comes in a few different colors.
- Sewing thread - for vines and floppy stems with leaves on, dab glue on a length of thread and dip in greenery material. Cut in shorter bits when dry.
Foam products
Green ground foam and related products comes in different shades, and also in different sizes, called turf, bushes, foliage, etc.
In 1:144 and other small scales, green foam (not too finely ground) works for most types of greenery, except for long and narrow or really large leaves - e.g., I wouldn't use ground foam for tulip leaves or rhubarb...
(Woodland Scenics)
(AMSI)
- Ground foam comes in a number of different sizes, there's also clump foliage for bushes, and stretchy foliage for trees. The various types go under different names depending on brand.
- Tree mixture - particularly useful for trees and shrubs, but I was surprised to see how good leaves it made on flowers as well.
Cut or punched paper
Use painted or colored paper (I prefer tissue paper or onion skin paper, and paint one side at a time). Colored paper might fade over time.
Tall, slim leaves for e.g. tulips are easy to cut. First, cut a fringe, using parallell cuts and leaving a narrow uncut strip across the bottom. Now you have leaves with square tops. Then make a slanted cut across the top part of each leaf, so the top becomes pointed. At the same time, vary the height (or is it length?) of the leaves slightly. Wrap the strip around the base of your tulips etc, attaching it with a bit of glue.
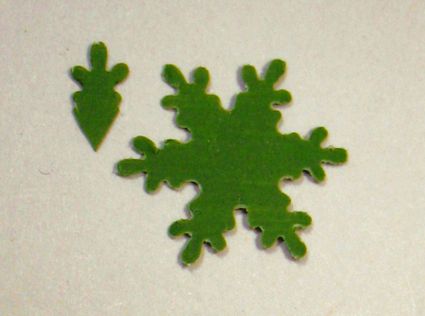
Punched or lasercut leaves are mainly useful in 1:48 and larger scales. A number of small punches are available from Hanky Panky Crafts, but you don't always need speciality punches. Two of Fiskars' old 3-in-1 corner punches (snowflake and hearts) can be used for a few different leaf shapes. The hearts punch has three sizes of hearts in the 3 to 4 mm (1/8" to 5/32") range plus two larger ones, and hearts can also be cut in half for teardrop leaves. Each of the snowflakes can be cut into six leafy shapes.
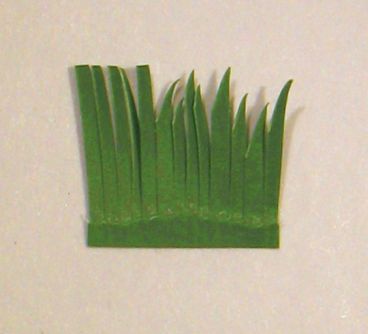
- Fringe style leaves - tulips, larger-scale crocuses, etc.
- Punched or laser-cut leaves - for 1:48 and larger scales, try to match them with real-life leaf shapes.
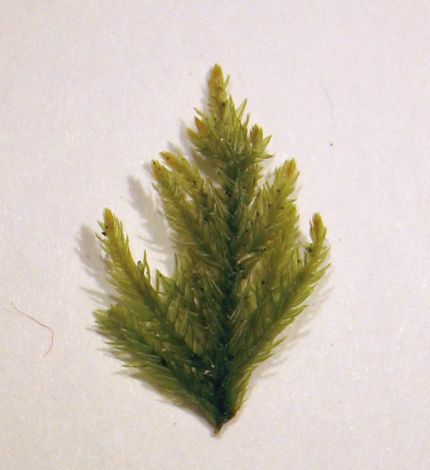
Natural materials
Nothing imitates nature better than nature itself, just be aware that dried plants may fade and turn brittle over time. Sometimes I've painted dried flowers or leaves with model builder's paint or slightly thinned craft paint before using them in a scene. The paint doesn't just add color, it also makes the plants less apt to break.
(Kitz!)
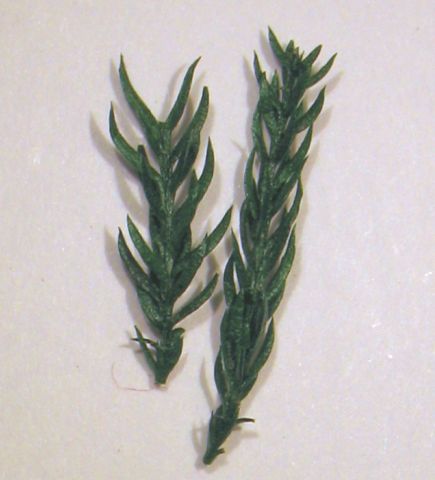
- Lycopodium - good for making 1:48 scale phlox. Individual "needles" can be used for leaves on 1:48 scale hyacinths and smaller scale tulips.
- Wispy fern - could make a good filler when you need short, narrow, leaves. And of course it looks like tiny spruce branches.
Other
(Noch)
- Leaves - these tiny punched leaves are good for various flowers, depending on the scale (e.g. 1:48 scale geraniums and 1:144 scale hollyhocks). If you're really patient, you can glue the leaves in place one by one. There's at least two or three different manufacturers.
- Sawdust - I suspect that it predates ground foam for model railroad landscaping. The dyed sawdust I've come across is a poisonous shade of green, but the shape and size of the pieces looks very promising. Dyeing your own helps get the colors you want.
Dye-It-Yourself
I've successfully dyed sawdust, granular model RR snow, white Woodland Scenics flower foam, and some RL fake snow that seems to be ground Styrofoam (you can also shred Styrofoam yourself on a cheese grater). You'll want to sift the sawdust with a couple of different metal strainers for a more uniform size. Sawdust and styrofoam works for leaves as well as flowers.
Stir the material with a few drops of paint in a disposable cup. Stirring thoroughly is crucial - you want to use as little paint as possible, as the paint also will glue the material together in lumps. Add more paint or material as needed. When done, stir a couple of times an hour until it doesn't stick together anymore (don't start a batch right before bedtime!). I've only done a tablespoon or so at a time; if you're preparing a larger quantity, you'll probably want to spread it on parchment paper or similar between the stirrings. When I dyed Woodland Scenics flower foam, I rubbed it between my fingers a couple of times while it dried, as it stuck together a bit in spite of the stirring.
Softwood (conifer) sawdust is said to be easier to dye than hardwood sawdust.
If you want to make large quantities, there was a landscaping how-to by Becky Holliday in Dollhouse Miniatures magazine (the August 2002 issue) that included how to grind and dye Styrofoam using a food processor. She also described how to dye sawdust.
Note that if you dye three different shades of the same color, the resulting blend will give the impression of shades and highlights. Use your chosen color as is, with a bit of white added, and with some more white added.
In bought flower mixes, the different shades typically look like color-matched flowers, rather than the natural shading of sunlight and shadows that you can create when you dye it yourself. I find that the larger the individual pieces, the less contrast is needed. An extremely fine-grained material such as dyed model railroad snow would need large contrasts, sawdust could do with less shading than in this example pic, while ground styrofoam would need very little shading (especially in smaller scales, where you mostly use the bits one by one).
Where to find supplies
With some obvious exceptions, all products shown are available either from dollhouse miniature dealers or model railroad stores. You could also try craft stores, especially the scrapbooking section.
Model railroad stores use to sell landscaping products from known brands (Woodland Scenics, AMSI, Noch, etc). Dollhouse and miniature dealers typically sell theirs in unlabeled ziplock bags, so it's hard to tell if two dealers carry the same product or not, unless you buy some and compare it.
On this page, I've mentioned supplies bought from these mini dealers:
- Bill Lankford
- Hanky Panky Crafts
- Kitz!
- Ladybug (Sue Thwaite)