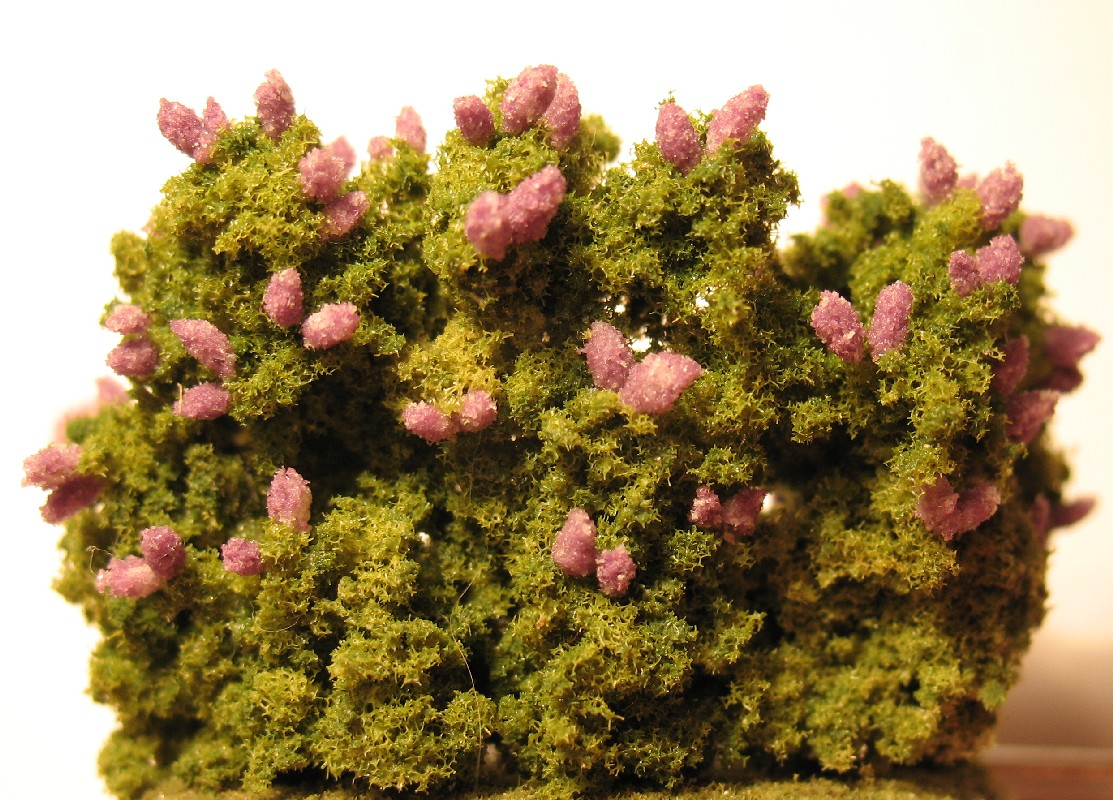
H0 scale lilac bush
Idea and instructions by Anna-Carin Betzén
These instructions can be used in several small scales, as you refer to other objects for size, rather than working from measurements. Please visit my garden center for an overview of all my free flower DIYs and other files about making flowers.
For H0 (1:87), 1:120, 1:144 and N (1:160) scale, I recommend that you use the supplies listed below. In H0 (1:87), you can also dye a really fine foam (like Woodland Scenics' flower foam) and use it instead of Nu-foam (please see my flower supplies page for suggestions on dyeing). 1:48 scale requires a fairly fine foam too, but you may want come up with some other way of making the actual bush. Just make a trial flowerhead from the supplies you plan to use, and check that it comes out the right size.
Supplies and tools
- Tacky glue
- Toothpick
- Lilac and white Nu-foam (for alternative supplies, see above)
- Clump foliage (I used Woodland Scenics'; light green)
- In-scale figure and house as a reference for scale
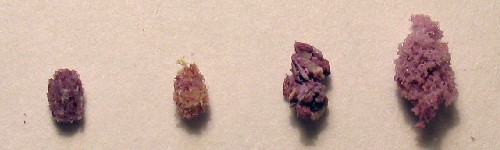
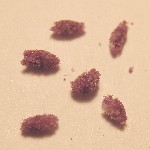
These sample flowerheads are shown much enlarged; the smallest ones are H0 scale and the largest is 1:48. Left to right, they're made from Nu-foam, dyed Woodland Scenics' flower foam, dyed sawdust, and a coarser ground foam.
From how they turned out, I'd say dyed Woodland Scenics' flower foam works fine for H0 lilacs, and coarse ground foam is fine for 1:48 as long as the over-all size is okay. But the sawdust lilac is pretty ugly - ground foam does a better job here!
Lilacs
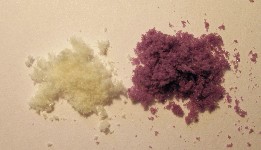
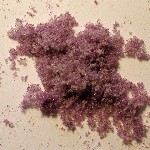
I thought the lilac Nu-foam was a bit dark, so I mixed it with an equal part white. Rub the powder-like foam between your fingers to blend the colors. The shading will add some depth to the finished flowerheads, but that's only visible up close, so skip this step if you like the color as it is.
If you dye ground foam (see the flower supplies page), you get the same effect if you stop adding paint before the foam is fully dyed.
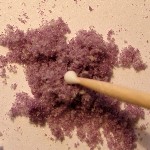
Dip the tip of a toothpick in glue and then in foam.
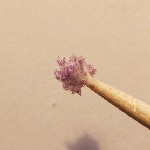
Transfer the glue and foam to your fingertip and roll to form an oblong ball, about as long as the hand of an in-scale figure in your setting. This will make the flowerheads slightly larger than scale, but it looks good and makes the number of flowerheads per bush more reasonable. At any rate, the flowerheads shouldn't be as long as a scale figure's head - then it may start looking ridiculous.
Getting the glue/foam proportions right is the hard part - too little glue, and it'll be like rubbing a pinch of sand between your fingers; too much glue, and it'll be a sticky mess.
You can also try mixing a small quantity of glue and foam and then take little globs of it and form into flowerheads, but in my experience it's hard to make more than two or three before the glue sets too much.
The exact shape doesn't matter that much, as long as it's longish and a little pointed. They often have one end that looks better than the other anyway - and only one end will show...
Make several flowerheads and let them dry completely - an hour or two should be enough. They're surprisingly sturdy when dry.
Planting the lilacs
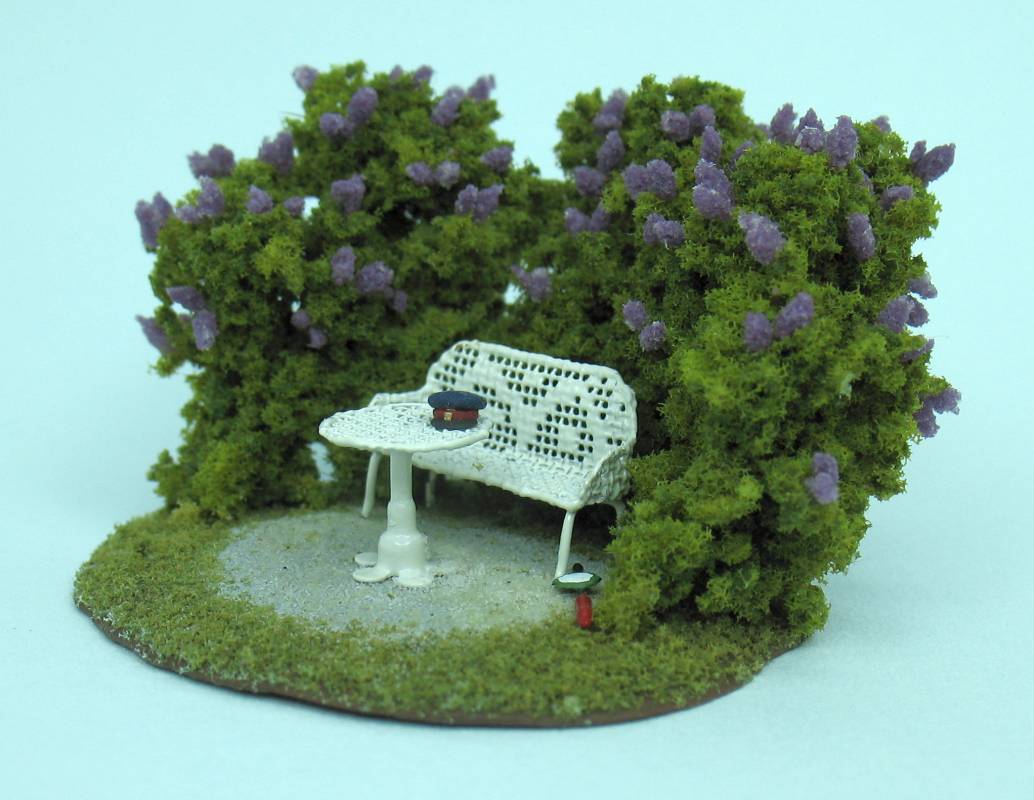
Create a bush/hedge/bower from clump foliage. As a rule of thumb, I think a grown lilac bush should reach above the ground floor windows of a house, but not above the windows of the next floor.
Glue the flowerheads on in pairs, each forming a 'V' shape. This is the key to making it look like a real lilac bush; the flowerheads always grow in twos or threes at the tip of the branches. Actually, if you don't put them in pairs, you need many more to make it look real! I had to put lots and lots of single flowerheads on my first lilac hedge, next to the 1:144 scale English cottage, before it started to look like a lilac at all. By the time I made the H0 scale lilac bower I'd noticed that the flowerheads came in pairs, and my bower looked like budding lilacs as soon as I stuck down the first few pairs!
Place most of the flowerheads close to the top, and none near the bottom. As you stick them in place, remember that the ugliest looking end goes in the glue! I find it easiest to glue them into gaps in the foliage, for stability and to hide the glue.
Further suggestions
If you want flowerheads on stems for a bouquet, you could dip fine wire in glue and insert it in the ugliest end of the flowerhead as soon as you've formed it.