1:48 scale chandelier
Idea and instructions by Anna-Carin Betzén
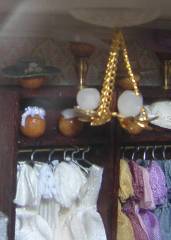
Chandeliers with glass shades are suitable for Victorian and later eras. I made them for my Bridal shop. It has a glass front, and the photos are taken in situ - hence the poor images.
My chandelier instructions were first published in the Little Enough News group on Yahoo, in July 2002.
Supplies and tools

- A flower-style metal finding with 6 points, about 12 to 15 mm (1/2" to 5/8") across
- Three beads about 4 mm (5/32") across (I used frosted clear plastic beads)
- Fine chain
- Wire (thin enough to go through the links in the chain)
- Wire cutters
- Superglue
- Tacky glue
Assembly
Glue beads to the top of every other point of the finding with Tacky Glue, and superglue lengths of fine chain to the other three (getting the chain to stick is the tricky part).
Pull a bit of wire through the free ends of the chains. Check that all chains are the same length so the chandelier is level, and also that it will hang at the right height in your room - usually above head height, otherwise your little people risk hitting their heads on it and ending up in a Mini Murder Mystery. Twist the wire ends to secure.
Add a pre-drilled ceiling medallion to the ceiling, or drill a hole deep enough to glue the twisted wire into. Trim the twisted piece if it's too long to fit. Superglue it into the hole.
Optional colored lampshades

Stick frosted beads on toothpicks for ease of handling, cover the beads with glass paint and wipe it off at once. Enough paint will stick to the frosted surface to color the beads in soft pastels, as seen in this photo. The exact effect will probably depend on what kind of glass paint you use.