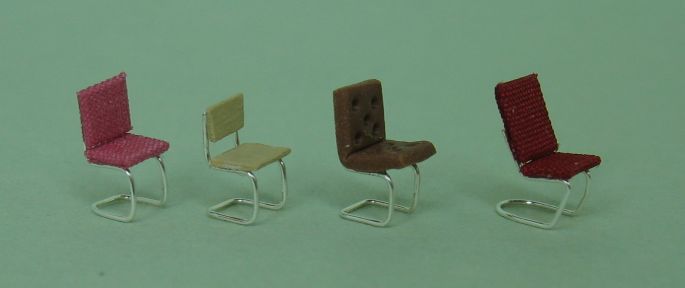
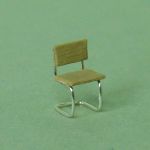
1:144 scale Art Deco steel tube chairs
Idea and instructions by Anna-Carin Betzén
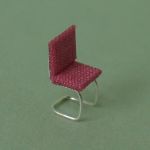
Three different seat treatments, plus a sun chair variation. My main inspiration was Marcel Breuer's 1928 Ceska chair, which looks pretty much like the 2nd chair from the left. Another source of inspiration was the book Art Deco house style by Ingrid Cranfield.
You'll create the wire frame for the chair without measuring, by bending wire around stripwood. The stripwood also helps preventing accidental squishing while you're shaping the wire frame.
This page describes how to make the chair, including some seat options. The seat how-to is also used by the bench how-to page.
Supplies and tools
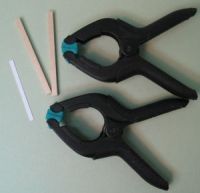
- Silver color copper wire (craft supply), about 0.3 mm thick (e.g. #28).
- Two bits of 2.5 mm (3/32") square stripwood, about 4 to 5 cm (1.5" to 2") long
- A strip of card, same width as the stripwood or a little less
- Two small craft clamps
- Wire cutters
- Tacky Glue
- Optional: Pliers (smooth jaw)
- For the seat, see additional lists in the seat section below.
Please note: Use copper wire if possible - if you can't find silver colored copper wire then paint the wire frame before you glue on the seat (paint intended for metal/plastic model building seems to work better than craft paint). If you substitute stiffer wire, the wire will spring back a bit at each bend once you remove the stripwood, and then you'll have to go back and adjust each bend with pliers.
Ceska chair
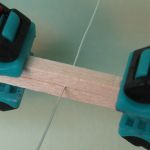
Cut a piece of wire, at least 5 cm (2") long.
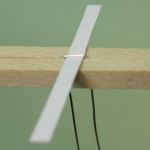
Sandwich the center of the wire between the stripwood pieces, at right angles. Clamp together at both ends.
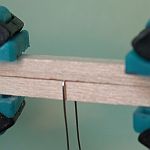
Press the wire down firmly against the one of the stripwood pieces, at right angles. The wire ends should be roughly parallel. This will form the back edge of the chair's base. Remove the clamps.
If you'd prefer a rounded back edge, skip the clamps and stripwood at this step and instead bend the wire around a round object the same thickness, like a knitting needle or a bamboo skewer. Again, make sure the wires are parallel.
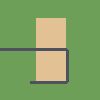
Now place the shaped wire between the stripwood pieces, inserting the card strip to keep it in place (with a rounded back edge, try a split toothpick). Clamp the stripwood.
Here's the same assembly again, as seen from the end of the stripwood. I'll use this perspective for all the graphics, as it makes it easy to understand what we're doing.
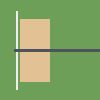
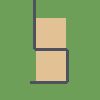
The base of the chair is clamped between the stripwood, now begin the legs by bending the wire ends upwards.
Each time you bend the wires, adjust them so they run at right angles to the stripwood, and parallell to each other.
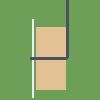
Finish the legs, and begin the seat, by bending the wires once more in the same direction. They'll end up next to the edges of the card strip.
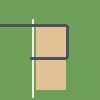
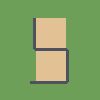
Remove the clamps and move the lower stripwood piece to the top, clamping them again. Check that no gap has appeared between the chair legs (to the right in this pic) and the stripwood.
The card strip will probably fall off at this point; that's fine. You won't need it again until you start your next chair frame.
To finish the seat and begin the back, bend the wires upwards.
Align your wire cutter with the top of the stripwood and cut off both wires.
(If you have used the wrong color of wire and want to paint it, don't cut the ends now. Instead, remove the stripwood and paint the frame, holding it by the ends, and cut the wires to length when the paint has dried.)
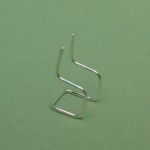
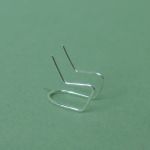
Remove both pieces of stripwood.
If you're not pleased with the chair frame's overall 'posture', adjust it with pliers. It's easiest to adjust the base/leg angle first, and then move on upward angle by angle (always adjusting both sides at the same time to keep it symmetrical).
Make a seat and back using any of the methods described in the seat section below.
I found it easiest to glue on the seat first and let the glue dry before I added the back.
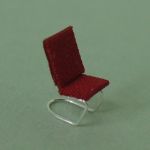
Sunchair variation: Here, I've used a frame with a rounded back edge, and adjusted all angles to give the chair a reclined look. This modification doesn't just affect the seat and back - the legs are angled forward to shift the point of gravity so the chair won't fall over backwards.
To the right, you can see the finished chair. I think it would've looked better with a deeper seat; you can make a frame with deeper seat while still the same height simply by changing the width of the stripwood you're using, to say 2.5 by 3 mm (3/32"×1/8").
Painted seat
You need:
- Business card or similar
- Craft paint and paintbrush
- Post-it note
Chair: Cut a strip that is just a hair wider than the wire frame. Measure the seat depth against the wire frame and cut off. Cut the back any height you like; on my tan chair it's about half as tall as the strip is wide. (For a chair where the seat and back meet you could also use a single piece that is creased, but IMHO it's hard to make it neat so I haven't included it in the instructions.)
Bench: Cut the strip a little deeper than the wire frame. Cut it a little longer than the frame, or if you want it an exact length do so and adjust the wire frame as described above.
Stick the pieces on a Post-it note and paint them. When the paint has dried, turn them over and paint the other side. Add a second coat if needed.
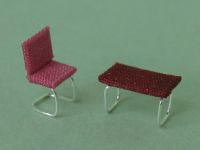
Upholstered seat
You need:
- Business card seats and backs, cut as for the painted seat
- Thin fabric prepared for upholstery as described on the fabric hints page
- Sharp scissors
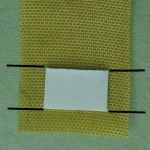
Glue a seat or back piece to the glue side of the fabric.
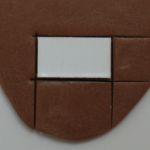
Trim the fabric along three edges, leaving about 1.5 to 2 mm (1/16" or a little more). Then cut on the four places indicated by black lines, forming two gluing flaps.
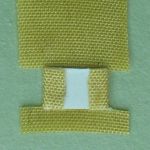
Glue the two flaps to the card.
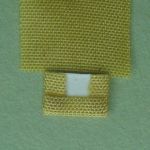
Similarly, cut to create a gluing flap at the third edge, and glue it down.

Trim the remaining fabric to match the width of the covered card.
Glue it down and trim off the excess at the end.
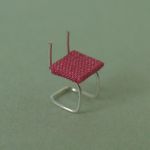
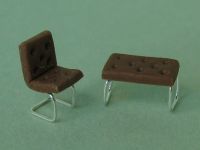
Tufted seat
A Fimo seat looks like leather if left as is - or paint it with flat craft paint, to look like tufted fabric.
You need:
- Fimo in your chosen color (if you mix your own shade, avoid transluscent as leather and fabric are quite opaque!)
- Ceramic tile
- Single-edge razor or other sharp blade
- A card template the size of the seat
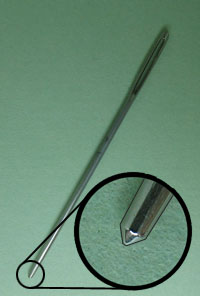
- Thick, blunt, needle or other tool with a suitable point (see closeup pic). A sharp needle will leave a tiny hole rather than an indent.
The clay should be a about 1 mm (1/32") thick; on my pasta machine it's the #6 setting.
With the clay flat on the tile, place the template on top and cut out around the edges. Lift off the template with the tip of the blade.
Remove excess clay.

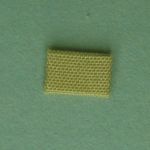
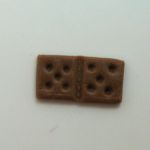
Bench seat: simply make indents with the tip of the needle.
I first made the pairs of indents near the ends, then the vertical pair at the center, and finally the two other ones.
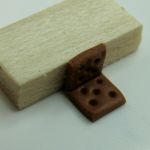
Single-piece seat/back: mark the seat/back transition while it lies flat, cutting a tiny wedge from the surface so it'll bend easily.
Then do the tufting (funny, it looks just like a domino block at this point!).
Lift the back part from the tile with the edge of the blade and rest it against a block of wood.
Harden according to package instructions.