1:144 scale Art Deco steel tube bench
Idea and instructions by Anna-Carin Betzén
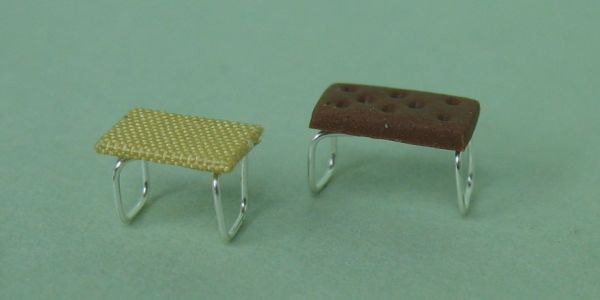
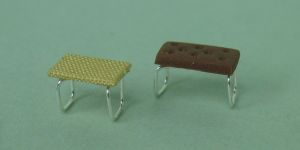
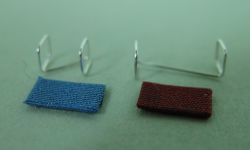
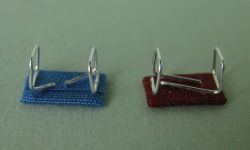
These Art Deco benches or stools (shown upholstered as well as with a tufted faux leather seat) are based on a circa 1930 illustration reprinted in Authentic Art Deco Interiors and Furniture (published by Dover Publications, the bench is in plate 47). For a little round four-legged stool, see the table page.
Please note: the how-to for the bench's seat is on the chair page.
Supplies and tools

- Silver color copper wire (craft supply), about 0.3 mm thick (e.g. #28).
- Two bits of 2.5 mm (3/32") square stripwood, about 4 to 5 cm (1.5" to 2") long
- Two small craft clamps
- Wire cutters
- Tacky Glue
- Optional: Pliers (smooth jaw)
- For the seat, see additional lists in the seat section on the steel tube chair page.
Please note: Use copper wire if possible - if you can't find silver colored copper wire then paint the wire frame before you glue on the seat (paint intended for metal/plastic model building seems to work better than craft paint). If you substitute stiffer wire, the wire will spring back a bit at each bend once you remove the stripwood, and then you'll have to go back and adjust each bend with pliers.
Bench
I used the same size stripwood as for the chair, but you can just as easily make the bench a different width and/or height by using a different size stripwood. Using 4 mm (5/32") square stripwood you could make a table base using the same method.
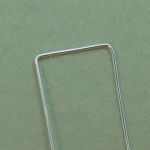
Cut a piece of wire, at least 5 cm (2") long.
Make two right angle bends near the center of the wire piece, e.g. 5 mm (3/16") apart. Ideally, this would be the diagonal distance between the legs in the finished bench - but you can adjust it later if needed.

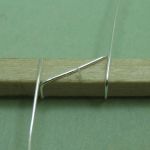
Place the wire at an angle over a piece of stripwood, the parallel wires aligned to the front/back surface of the stripwood (holding it in place with a finger helps).
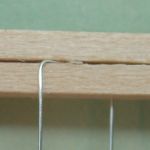
Place the other piece of stripwood on top, and clamp together.
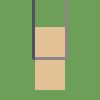
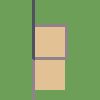
Turn the assembly so the wires stick up instead of down. The graphic shows it as seen from the end of the stripwood.
In the graphic, the wire closest to you is shown darker than the other.
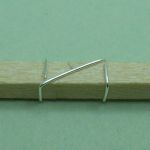
Make a bend using one end of the wire...
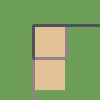
...and another bend with the same end.
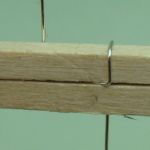
Just to be sure you got it right... from another perspective, now it should look like this. The wire to the right in the photo is the dark one in the graphic above.
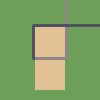
Turn the assembly around so the wire that runs over the top of the stripwood and then straight down is at the far end.
Bend the closest wire just like you did with the other one; a first time...
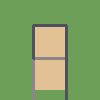
...and a second time.
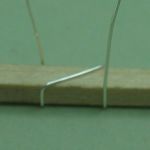
Remove the clamps and the loose stripwood piece.
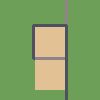
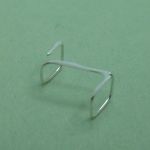
Bend both wires one last time.
Snip off both wires a little short of the edge to allow for the wire running diagonally.
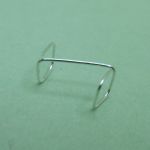
Gently ease the wire frame off the stripwood.
Prepare the seat as described in the seat section on the steel tube chair page.
If you find that your wire base is too long, or too short, for the seat size you want...
...just cut the diagonal wire at the middle, so you can glue both pieces on independently - closer together or further apart, as you like.
When you glue the seat on, spread glue on the entire 'Z' shape formed by the diagonal and the ends of the wire.
Stool
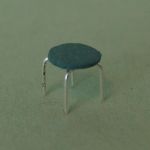
This stool is made just like one of the tables on the table page (see that page for instructions), but I used a 3 mm (1/8") Fiskars paper punch for the seat, and the legs are cut against 3/32" stripwood.
I know stools like this were popular in the 1950s or 1960s, but I'm not sure if they existed as early as in the Art Deco era.
© Copyright Anna-Carin Betzén 2008. You're welcome to print the instructions or link to them, but do not copy them to repost elsewhere. This is a free project, not to be taught for profit.