
My nephew's home in 1:48 scale
My nephew was under 3.5 years old the first time he saw one of my roomboxes, but he was instantly fascinated and would sit still and study it closely for a very long time. The same thing happened again later, when I brought another roombox to show him. So, I thought it would be fun to build him one of his own for his 4th birthday.
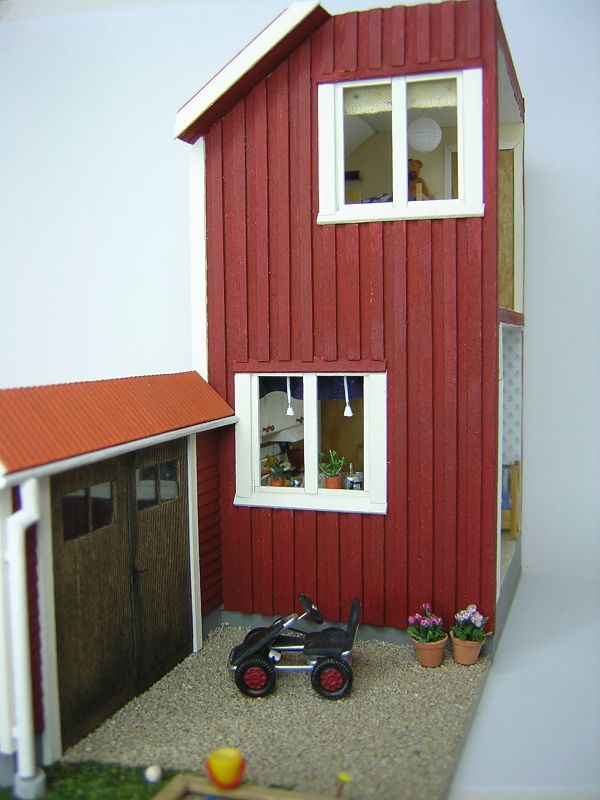
Part of his family's home was perfect for adapting into a miniature setting. The kitchen and kids' room with a view of the driveway and garage, and the sand box on the lawn next to it, were situated just about the same in real life.
Construction
I used a back opening shadowbox to house the setting, papering the inside with sky print paper (sold as a backdrop for model railroads).
I built the rooms, garage wall and ground as a single unit that I could finish entirely inside and out, and then slide it into the box. That way, it was easy to assemble and hopefully will it also be easy to repair in the future. E.g., if there's an "accident" and glass cracks, I could just replace the actual shadowbox. The slide-in/out arrangement also made it really easy to photograph - no glass to consider!
The protective glass front shadowbox has a basic "trompe l'oeil" painting on the outside; I wanted it to resemble a wrapped gift, with ribbons and a label saying he got it from me on his 4th birthday.
The distinctive window trim (emphasising the left and right edges of the window) is seen on many houses in the area, dating perhaps from the 1960s and on.
Outdoors
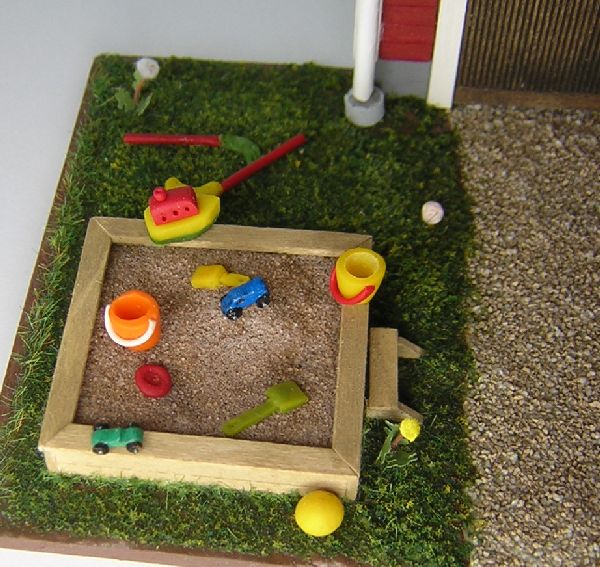 The two little cars in the sandbox, and the one in the kids' room, were made
by Teresa's Miniature Creations in Naperville, Illinois, USA. I made the rest of the toys from Fimo clay. The dandelions were made according to a how-to by Sue Thwaite (a.k.a. Ladybug) in
Little Enough News (volume 1, issue 3).
The two little cars in the sandbox, and the one in the kids' room, were made
by Teresa's Miniature Creations in Naperville, Illinois, USA. I made the rest of the toys from Fimo clay. The dandelions were made according to a how-to by Sue Thwaite (a.k.a. Ladybug) in
Little Enough News (volume 1, issue 3).
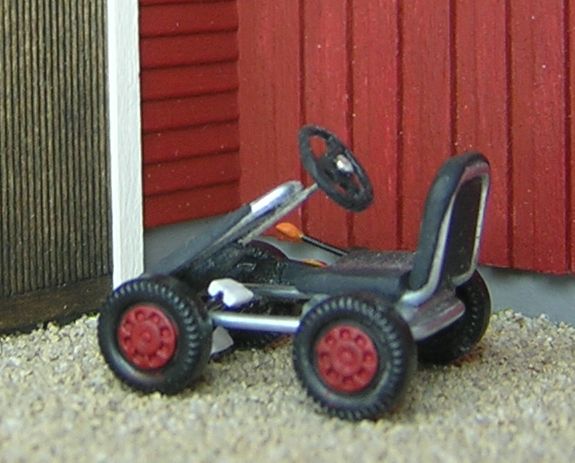
He was getting big enough to use his mother's childhood pedal car, so I wanted to include my interpretation of it. Also, it would add some interest to the big empty driveway. At first, making it seemed overwhelmingly complex, but then it cleared gradually. For a start, I had some ready-made tiny wheels from a hobby shop sale. I bent craft wire into a basic framework, impressing it into the Fimo clay I used for the seat and front. I think I used one half of a snap fastener for the steering wheel.
When I tried to glue the different wire pieces together with CA+ glue, I realized that the glue joints would be very weak as the wires barely touched, so I used an old trick I'd picked up
- sprinkling baking powder on wet CA+ glue makes the glue set in no time, and adds a lot of bulk. With a few applications of glue and baking powder, the car was nice and sturdy.
Kitchen
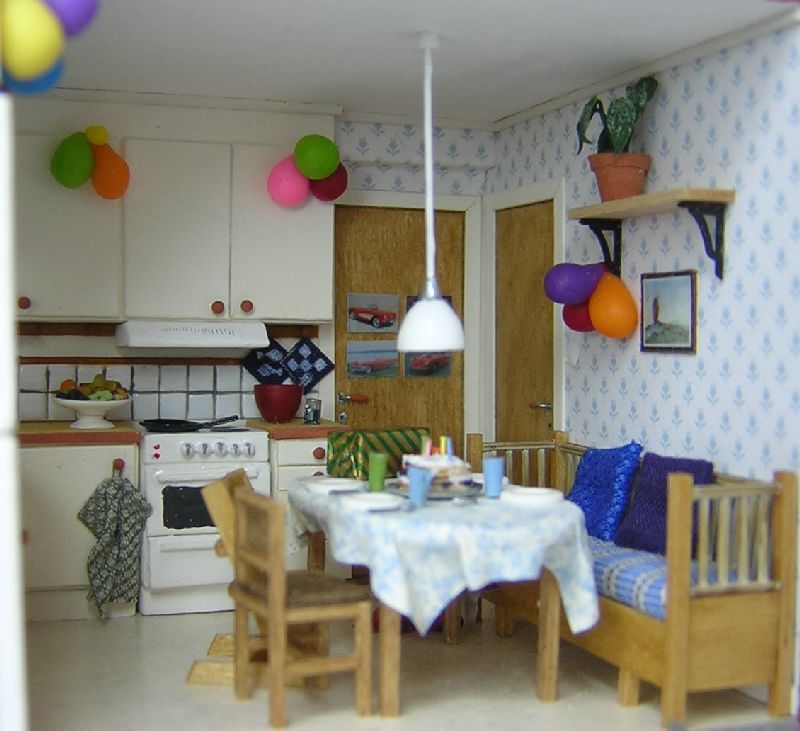
I copied the kitchen closely from photos I had. Nearly everything is built from wood, card, metal wire, and fabric. The "wire" plate rack is a cheat - I glued together three bits of clear plastic, and a little bit of wire so it would stand up, and painted white stripes on the clear plastic.
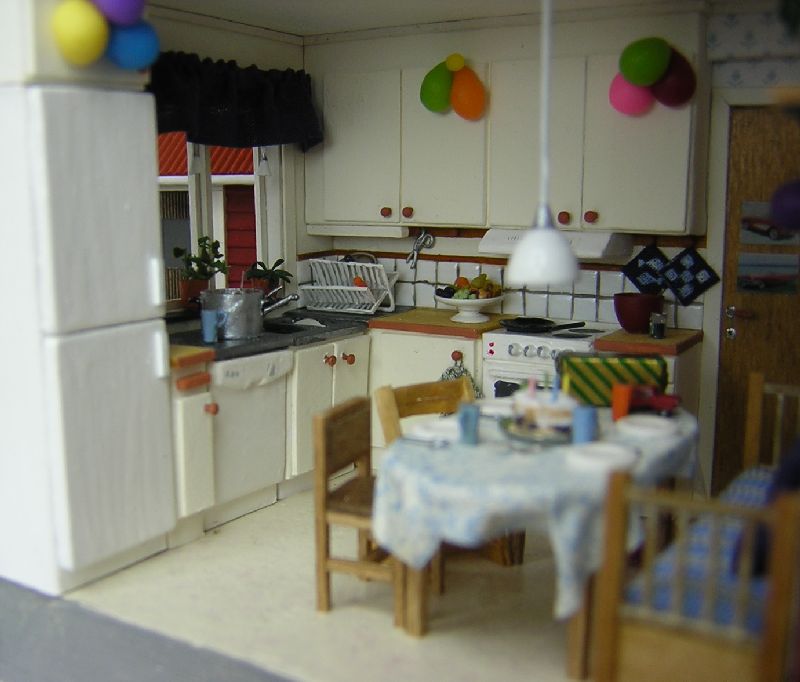
The settle's back and arms are made from plastic fencing, the mixing bowl and lamp are fly fishing cone heads, the fruit plate is made from two Grandt Line train model lamp reflectors, and the cupboard knobs are cut off heads from pins. All repainted, of course.
The car posters on the door and the painting above the sofa are photographic prints, as described below. On the painting, I used FolkArt's Dimensional Brush Stroke Medium to change the glossy
surface into a painting-like one, but I doubt that anyone will spot the difference!
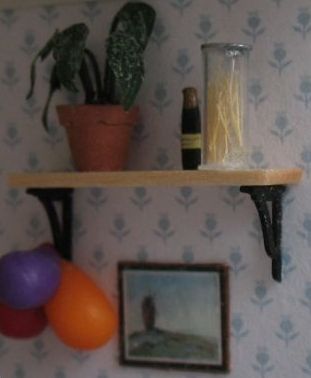
Later, when I repaired the roombox, I added a couple more details - magnets on the fridge, holding notes and postcards, and a jar of pasta and a bottle of wine on the wall shelf.
Birthday celebration
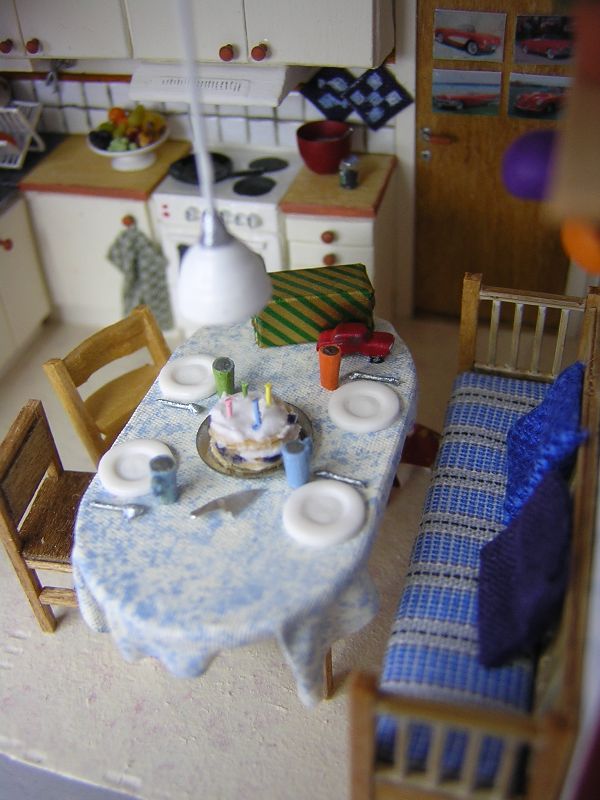
The kid-friendly birthday cake is made of crepes layered with whipped cream and blueberry jam. Yum! I made it from Fimo, with brush bristle candles. The crepes pan, mixing bowl, and jam jar from preparing the cake can be seen elsewhere in the kitchen.
The little car on the table is a metal model from The Quarter Source, which I painted. The plates were a how-to by Lyn Latimer in Little Enough News (volume 2, issue 2). The spoons are bits of wire with a blob of glue on one end, all painted silver. The mugs are cut from toothpicks and painted. I decorated the room with Fimo balloons (see my directions for 1:48 scale party decorations in the DIY projects section of this site).
The kids' room
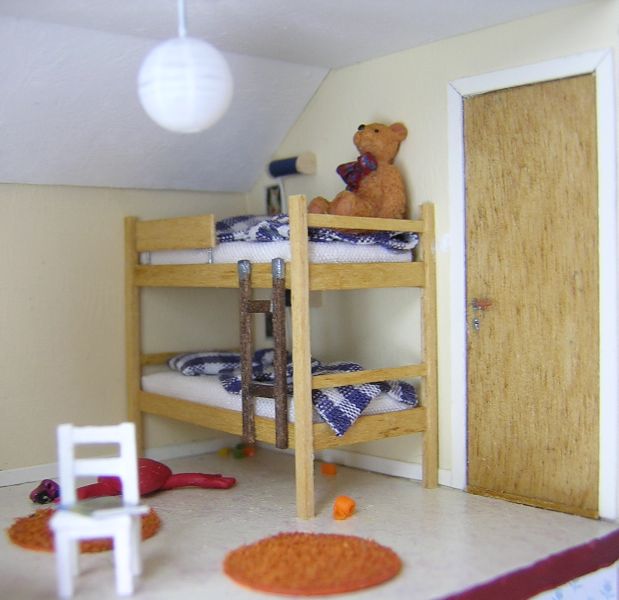
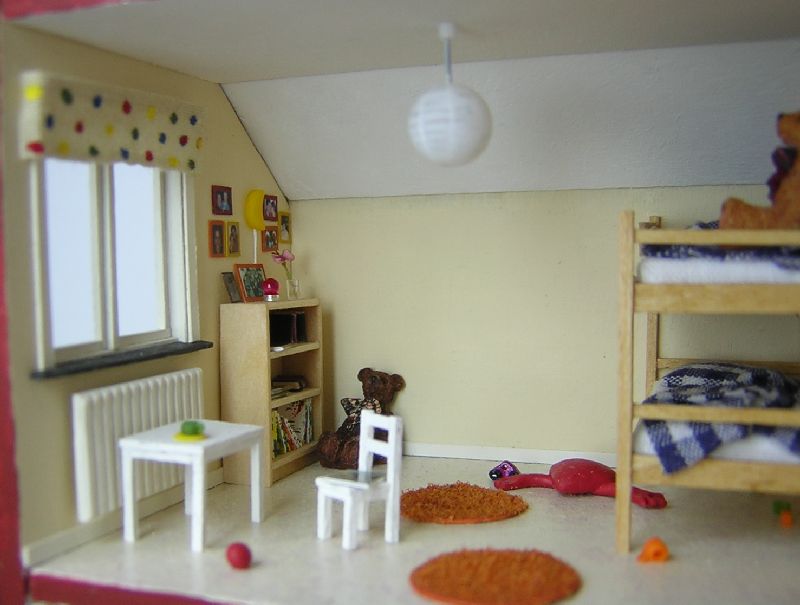
Some of their furniture was from IKEA, so I could just refer to their catalog for exact measurements. Very convenient!
The arrangement of photos in brightly colored frames, lamps, and knickknacks on top of the bookshelf was a distinctive feature of the room, so I tried to copy it exactly.
For the ceiling lamp, I painted a matte clear plastic bead to resemble a rice paper lantern.
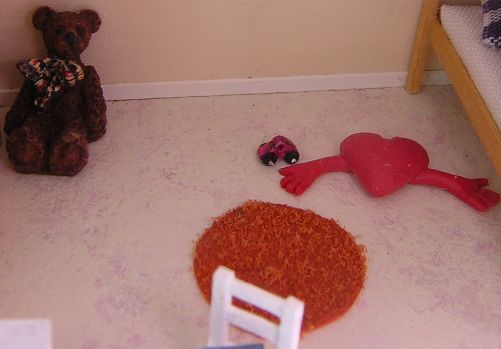 I touched up two bought resin teddy bears to resemble the kids' bears.
The little car is from the same source as the ones in the sandbox, and the red huggable heart is a soft toy from IKEA (I made the heart from Fimo, and the balls and building blocks too).
I touched up two bought resin teddy bears to resemble the kids' bears.
The little car is from the same source as the ones in the sandbox, and the red huggable heart is a soft toy from IKEA (I made the heart from Fimo, and the balls and building blocks too).
Photos, posters etc

To recreate the posters and framed photos, I used photos of the actual items, squared them up and scaled them down (including frames), then ordered a photographic print with them all on. I cut out each print and touched up the cut edges with paint to match the "frame".
If you do it the right way, this method of reproducing photos gives better quality than color printing does. The guardian angel print by the bed is about 4 mm (5/32") tall, but still easily recognizable.
One happy owner
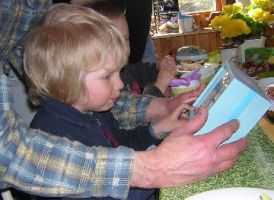
Here, my nephew gets his first look at his gift. This time, his grandfather held the box securely, just for sure. But ever since then, my nephew has handled the roombox himself and I'm really impressed that he's taken so good care of it (though of course, if he hadn't been careful when looking at my minis, I wouldn't have made him a roombox in the first place).
The roombox had just one slight accident, which made the bunk bed and one or two accessories come loose. When I was going to fix it, I managed to drop the bed myself. So, ironically, I spent much more time repairing the damage I myself had done, than fixing the original problem...