1:48 scale books
Idea and instructions by Anna-Carin Betzén
I enjoy reading, so I like to put some books in each of my houses and roomboxes for the mini inhabitants to read. Here are three methods, for creating different types of books.
Supplies and tools
Depending on which method you settle for, you need a selection of these:- Thin leather (synthetic leather might work too, if it's thin )
- White cardboard, 0.5 to 1.5 mm (1/32" to 1/16") thick
- Colorful picture from a magazine (thin paper may work better than thick)
- Chopper (with a sharp new blade)
- Gold colored gel roller pen
- Gold paint or gold marker pen
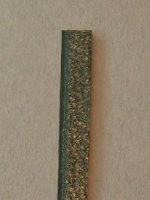
If making a multi-volume encyclopedia or similar to place on a shelf, I suggest you glue the finished books together as a set, before decorating the spines with a gel roller pen. This makes it easy to make markings on the spine that line up across the set.
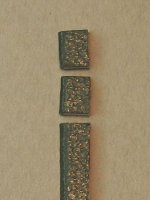
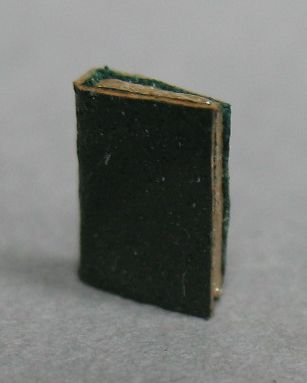
Quick leather-bound books

These are good for filling a bookshelf quickly, when the page edges won't show anyway.
It's and excellent method to use if you want to fill a shelf with books bound in leather, but the leather you have is rather
thick (from a mini point of view, that is - like 1 to 1.5 mm (1/32" to 3/64").
Leather that is firm but not stiff seems to work the best.
Soft, thick, leather seems to have a somewhat fluffy back side; books made from it won't stay fully closed - they tend to open up a little.
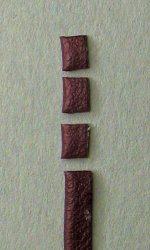
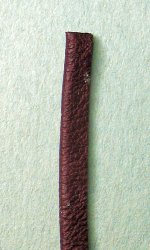
Cut a strip of leather, 6 to 10 mm wide (about 1/4" or 3/8"). Spread glue on it and fold lengthwise so it's half as wide.
Allow it to dry thoroughly. Then use the chopper to cut it in pieces about 3 to 6 mm tall (1/8" to 1/4").
Decorate the spines with a gel roller pen if you like.
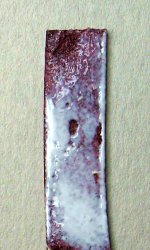
Paperbacks or leather-bound books, with white edges
This is just the same concept as for the quick leather-bound books above, only there's a strip of cardboard inside to suggest there are pages in the books.
It also works very well for making paperback books.
Using e.g. a picture from a magazine for covers gives you lots of different book covers with a minimum of work.

Cut strips of cardboard, 2 to 5 mm (3/32" to 3/16") wide.
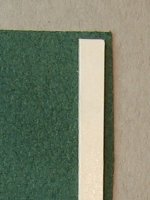
Glue one of them close to the edge of a piece of your chosen cover material (paper or leather). There has to be at least 10 mm (3/8") along the other edge, so you have some to turn over to cover the other side of the book.
Trim along the edge.
Spread glue on the cardboard strip, and fold the cover material over to cover. Allow it to dry thoroughly.
Trim along the edge. Cut in 3 to 6 mm (1/8" to 1/4") pieces with the chopper.
On leather-bound books, decorate the spine and/or front with gel roller pen.
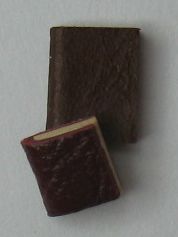
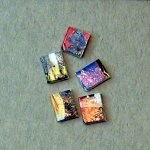
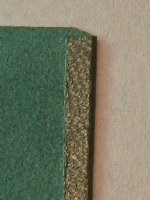
Neat books with edge gilding
If you'd like to make individual books for display, this is the neatest way I've tried. They're slower and more fiddly to make compared to the other types, so I mostly use them when I want one or two nice books to accent a scene.
Cut rectangles of cardboard, about 3 to 6 mm (1/8" to 1/4") tall and 2 to 5 mm (3/32" to 3/16") wide. These will be the "pages" of your books. (When making several books the same size, e.g. for a multivolume encyclopedia, I find it easiest to cut a strip of cardboard to the right width, and then cut it into pieces with the chopper.)
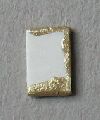
Color three edges (all but the spine) gold if desired, using paint or marker pen. Allow to dry.

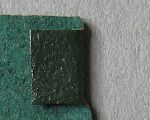
Glue the cardboard piece to one corner of the leather piece (gilt edges facing the edge of the leather).
(When making several books the same size, you can save some time and material by using a strip of leather that's a smidgen wider than the books are tall.)

Trim excess leather around the three gilt edges. You may want to leave an ever so tiny lip of leather, like on a real book.
Spread glue on other side of the cardboard piece, and fold over.

Trim excess leather.
Decorate spine and front with gel roller pen if you like.