Cutting and shaping wood for 1:48 and 1:144 scale
Text by Anna-Carin Betzén
Some hints and techniques for small-scale woodworking:
Cutting with the Chopper
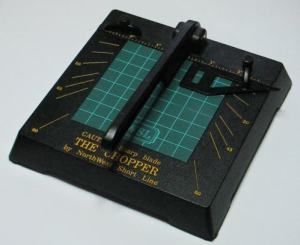
For a nice cut on both back and front on e.g. a 1 mm (1/32") strip, start with a shallow cut, then flip the woodstrip over and cut through from the back. On thicker stripwood, like 3×3 mm (1/8") make shallow cuts from all four sides rotating it a quarter turn towards the back every time, then cut through the rest - the cut will be perfectly straight, neat, and effortless. (Why turn it towards the back? Because otherwise the back edge of the blade may cause a bit of splintering.) The chopper obviously can't take just any size wood, but basswood up to 6 mm (1/4") works fine when you cut it from all four sides.
Really thin scale lumber (0.3 mm or less than 1/64") tends to slip under the edge of the guide. To prevent this, lift one long edge of the strip slightly while pushing it in place against the guide, then lay it down flat for cutting. Cut through in one pass, it's so thin that it'll cut at once, and pretty neatly too.
In hardwood I've only done a couple of 1:144 pieces, so I haven't tried the Chopper for this. My gut feeling says it may work on thin pieces but on thicker ones I'd rather use the miter block and razor saw. I think the Chopper is more of a basswood and balsa tool, really.
If cutting balsa, cut from all four sides and be sure to use a brand new blade; it makes all the difference. An ever so slightly used blade will squash the interior of the strip.
Don't use the chopper to cut along the grain - a steel straight edge and a few strokes with a scalpel or X-Acto works better. (BTW, if you don't have the right dimensions of wood for the basis of a wardrobe, bed, chest etc, it's usually easier to glue it together from smaller bits, than to shave some off the side of a larger piece.)
Cutting without a Chopper
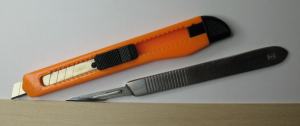
Cut thin strips with a scalpel or X-Acto knife.
I prefer them to a utility knife, as you can cut across a woodstrip by pressing the blade down, while the utility knife only cuts with the very point, as you can see in this pic.
Scalpels are superb on thin scale lumber. On thicker wood it may not be possible to cut straight through just by pressing down (you may then have to score a couple of times to go through it), but that initial cut will help guiding the blade much better than a mere pencil line would.
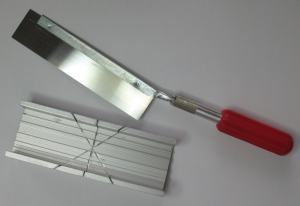 For thicker wood, use a razor saw and miter box. Do get a 54 tpi (21 teeth per cm) blade for it, as it makes much neater cuts than the more common 22 tpi (9 teeth per cm) blade.
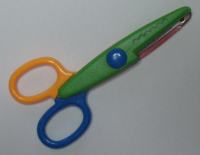
Fuzzies on a cut edge are easiest trimmed with scissors (quicker and neater than sanding).
Punches and fancy scissors
They usually work on PaperWood and on the very thinnest scale lumber (0.3 mm or less than 1/64"), and they might work on the next thickness (0.6 mm or 3/128") too. (If you want to use them on thicker wood, experiment at your own risk - you might damage your punches!) I think hardwood would be way too hard to cut.
However, delicate shapes with narrow sections on cross grain will be prone to break. Try cuts at different angles to see if another direction of the grain works better for you. E.g., if you're using scissors on PaperWood, you can try cutting the piece across the grain as well as along the grain.
Using files

Needle files often come in sets of 10 or 12. Mine is a cheap set found in a hardware store, but it works fine all the same.
To file an indent of some sort (as opposed to rounding a corner), first file a notch where the center of the indent will go, using a three square file (see pic). Then go on to shape it further with the files that best suit your purposes. The distinct notch from the three square file is made in a snap, and makes it easy to center the file you'll use for the actual shaping.
Symmetrical pieces are best made in pairs. Align the edges of e.g. the wood strips and file both pieces as once, flipping one of them over once in a while to make sure they become (or stay) symmetrical. Turning them upside down so you're filing from the other side from time to time helps too.
A large piece is easier to handle than a tiny one. If you need a tiny piece of stripwood filed to shape, start out with 10 cm (4") or so, do the filing (all of it, or as much as possible), then cut it to size!
Be careful when filing and deepening indents in the long grain of thin stripwood pieces, especially near the end of the strip. Don't use any pressure at all, just rest the file against the wood and gently file back and forth. If you apply too much pressure, the part between the file and the end of the strip may split along the grain and fall off. You'd be surprised to see how little pressure it takes!