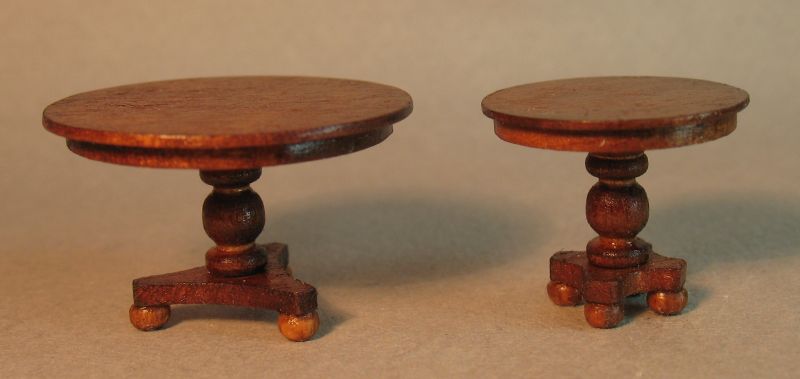
1:48 scale early Victorian center table
Idea and instructions by Anna-Carin Betzén
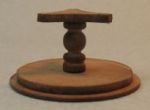
Center tables like these were used in the 2nd quarter of the 19th century. My smaller table is closely based on a tilt-top doll-size table (1:4 scale) that I saw on the web. When I scaled it down, I chose to add the apron and make the table non-tilting.
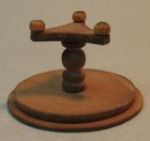
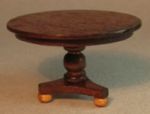
When searching for additional pics of early Victorian center tables, I found that the base usually had three feet rather than four. So my second, larger, version of the table has a base with three feet.
This type of table originated in the Regency period; at that point they often had a straight column pedestal and paw feet.
Supplies and tools
- Sheetwood - 1.5 mm (1/16") for base and apron, 1 mm or thinner (1/32") for tabletop
- Wooden turning for the column, cut to 10 mm (3/8") long (I used a piece from Tiny Turning #1000, see Supply sources)
- Tiny wooden beads for bun feet, about 2.5 mm (3/32") across and 1.5 mm (1/16") thick (or cut circles from the thicker sheetwood and sand into shape)
- Circle template or drafting compass
- Chopper
- Sanding tools
- Needle files
- Your chosen stain and clear finish (I used spirit-based mahogany stain and Danish Oil)
- Tacky Glue
- Paintbrush
- Optional: matching paint for touching up the feet (I used burnt umber)
Early Victorian center table
To cut out circles and other "weird" shape (like the table base), I mark out the shape and use my chopper to cut the piece squarely near the lines, then chop the corners close to the lines, and continue to chop off progressively smaller pieces here and there to get closer and closer to the desired shape. Then I use sanding tools to remove the remaining excess wood (for the concave sides of the base, use files).
Cut the tabletop from 1 mm (1/32") sheetwood, 25 mm (1") diameter for the larger table or 18 mm (3/4") for the smaller.
Cut the apron from 1.5 mm (1/16") sheetwood, with a diameter 2 to 3 mm (1/16" to 1/8") smaller than the tabletop.
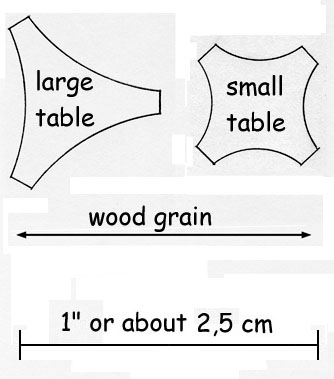
Print the pattern for the base (shown to the right, click on the pic for a higher resolution), and measure the size indicator to check that it's correctly scaled. Please note that what size the pattern will turn out may depend on your browser. Printing from an image viewer rather than browser may help with scaling. If all else fails, use a photocopier to enlarge/reduce.
Cut one base from 1.5 mm (1/16") sheetwood.
(In the pattern, the base for the small table is a little larger than on my finished table, as mine turned out too small).
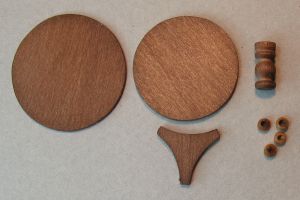
Stain the tabletop, apron, pedestal, base and feet. Let them dry. The photo to the right shows all the parts (I stained an extra foot for the table, just in case).

Glue the pedestal to the base.
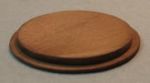
Spread glue on the apron and stick it to the tabletop.
Weigh down flat to dry.
Glue pedestal assembly to the center of the apron, checking that it sits straight and in the center.
Glue the feet to the base.
When the glue has dried, apply the clear finish as per product instructions. I used two or three coats of Danish oil.
At this stage, it's obvious that the wooden beads I used for feet didn't take stain very well.
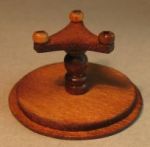
When the clear finish had dried (sealing the wood so it wouldn't absorb paint), I took a tiny bit of burnt umber paint on a firm paintbrush and touched up the feet, aiming for a a glaze rather than a solid coat (sort of a "faux painted" effect). I used artist's oil paint but waterbased paint would work as well.
In this pic, the foot to the right has been touched up with paint - it makes a great difference.
Regency variation
For a Regency center table, make the pedestal from 4 mm (5/32") dowel or a less curvy turning (e.g. Tiny Turning #4000). The feet could be paws rather than buns, and perhaps even gilded.