1:144 scale wreaths and swags
Idea and instructions by Anna-Carin Betzén
You can make both wreaths and swags using the same basic supplies. My method makes the baubles less protruding than if they're glued on afterwards; I like it better this way, but of course it's a matter of taste.
At the bottom of the page you find my easy how-to for a skinny bow.
Supplies and tools
- Tacky Glue
- Finely ground green foam (found among model railroading supplies)
- 0.5 mm (1/64") no hole beads
- Ultra-fine glitter (available from Kitz! - check out my Supply sources page in the Resources section)
- Waxed paper
- Pencil and typing paper
- 3 mm (1/8") circle craft punch (optional)
- Toothpick or similar for applying glue
- Uncooked spaghetti straw (optional, for placing beads in the glue)
- Aleene's Stiffy fabric stiffener (or mix equal amounts Tacky Glue and water, and add a tiny dab of washing-up liquid - this will help it soak in)
- For bow (optional):
- Cotton sewing thread
- Sewing pins
- Foamcore
Making a wreath
 First, make a template for your wreath. Either draw the shape on paper, or use paper with a punched hole like I did. Cover the template with waxed paper (in this pic I haven't done that yet).
Please note: When using this method you'll need to do a few things quickly in succession, before the glue dries too much. Prepare your supplies and tools: put a generous pinch of ground foam on a bit of paper where you can reach it easily, and pour some no hole beads in a jar lid or similar. Fetch a spaghetti straw, if you'd like to use one to place the no hole beads.
 Ready to start?
Apply a line of glue according to your template.
Note: Move on to the next step immediately!
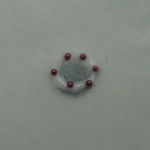 Place no hole beads in the glue.
Note: Move on to the next step immediately!
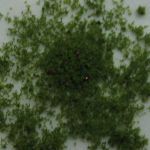 Cover the wreath completely with green foam. Pat the foam to make sure it sticks to the glue.
Relax! Now the glue will have to dry before you can proceed.
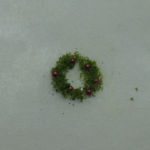 When the glue is completely dry, blow or brush off the excess foam.
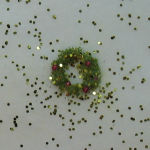
Apply Stiffy or diluted glue to the wreath. The ground foam will soak it up like a sponge. Sprinkle with ultra-fine glitter.
Leave the wreath to dry completely.
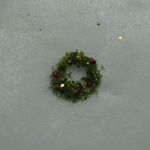 Blow or brush off excess glitter.
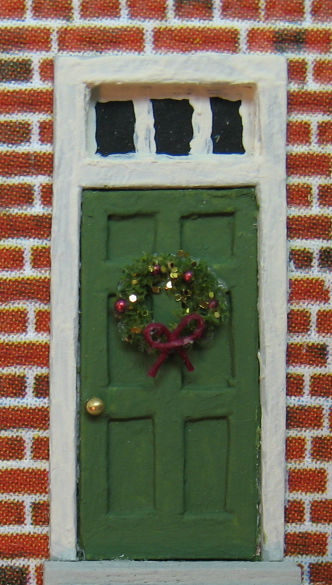
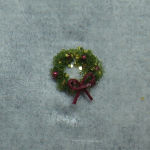 If you want a bow, make one according to the instructions below and glue on.
Your wreath is now ready to use, just peel it off the waxed paper.
Wreath variations
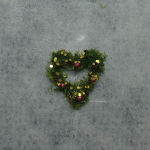
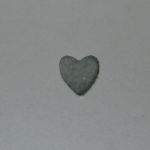 For this heart-shaped wreath I used a 3 mm (1/8") punched heart as a template.
 For a Summer wreath, omit the no hole beads and sprinkle with floral foam instead of glitter.
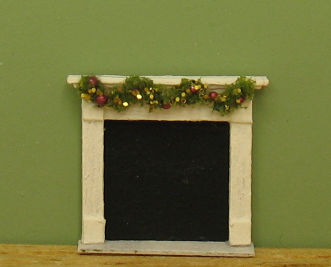
Swags
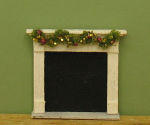
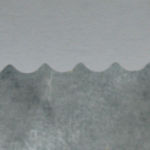 The swag is made exactly like the wreath. It's just the template that looks different. I made the template by cutting with decorative scissors (a tiny scallop with a 3 mm or 1/8" repeat).
Making a skinny bow
I call them skinny simply because they're made from sewing thread. If you use this method for making bows from ribbon, they'll look weird.
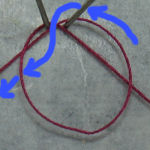
Cover the foamcore with waxed paper. Stick two sewing pins into the foamcore, about 1.5 mm (1/16") or less apart, and angled out a little. The less they angle out, the closer they can be (in the pics below, mine angle out more than needed).
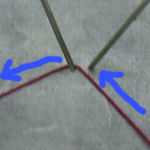 Run the sewing thread from the lower right, up between the pins and to the right...
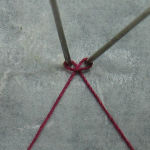
 ... then left to right below the pins...
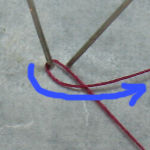
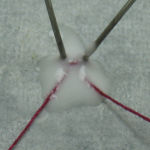
 ... behind the right pin and forward between the pins, then cross under the thread from the previous pic, and continue to the lower left.
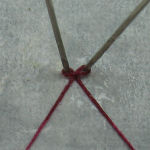
 Tighten both threads - voilà, a bow!
 Put a blob of Stiffy or diluted glue over the entire bow, then immediately soak up the excess with a tissue.
 Leave it to dry.
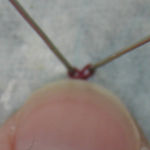 Hold the bow down with the tip of your nail while pulling out the pins. Peel the bow off the waxed paper.
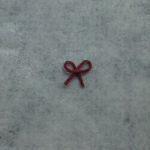 Trim the ends, and your bow is ready to use.