1:144 scale vase
Idea and instructions by Anna-Carin Betzén
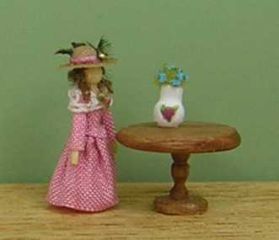
An easy-to-make large vase for your miniature table. I've used one in the drawing room of my Georgian townhouse, to fill the fireplace opening during the Summer season. (In case you wonder how I made the table, I cut the top and base from hardwood veneer and "hand turned" the pedestal from matching stripwood using various needle files.)
Supplies and tools
- Plastic price tags holders from clothes etc
- Chopper or scalpel for cutting
- Sandpaper
- Tacky glue
- Toothpicks
- Paint for the vase - preferably one of the brands sold for use in plastic modelling or wargaming, as they stick well to plastic. There are both water-based and solvent-based brands.
- Green clump foliage or other small-scale greenery
- For the flowers: craft paint, or any of the other options described in the paragraph about adding flowers
Making the vase
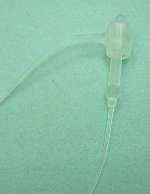
The plastic price tag holder I used looked like this, the vase is cut from the closure.
Tag holders come in different designs, shapes, and sizes; use your imagination to find different vases in the ones you come across. There are other interesting shapes in it too, notice e.g. the
barrel shape.
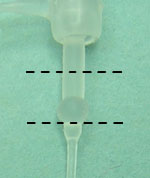
Two cuts are needed, as shown. You may want to cut away the barrel-shaped part of the closure (at the top in this pic) before starting. Once that's done, I find it easiest to cut the vase with the Chopper. I usually need to sand the cut afterwards so it sits straight. Aim for about 3 mm (1/8") height for a large vase or 4 mm (5/32") for a really tall one.
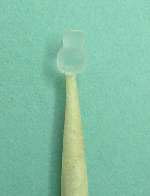
If your price tag holder is made of very clear plastic, you can skip painting it and use it for a clear glass vase. And if you cut a really tiny vase shape, say 2.5 mm (3/32") tall, you
could turn it into a pitcher by gluing on a piece of thread or fishing line for handle, and a tiny glue blob on the rim for spout.
If you want to paint the vase, or put flowers in it, you need something to hold on to.
Glue the base of the vase to a toothpick, using a tiny dot of glue. Leave to dry completely.
Painting the vase

Paint the vase in your chosen color.

You can paint a simple design using e.g. a sharp toothpick or a cut off sewing pin. Though I generally prefer plastic modelling paints when painting plastics, craft paint seems to work tolerably well for adding little details on the item I've already painted.
Here I'm trying to paint leaves...

...and a flower. Letting the paint dry between each color helps preventing smearing and inadvertent mixing of colors.
I think the painting on my matching urn turned out a little better. You may want to check out the additional painting hints on that page as well, for a quite different painting technique.
If you're stocking a porcelain shop you might not want flowers in your vase. In that case you could paint a grey dot on the top to suggest an opening (a toothpick dipped in paint is great for
making dots).
Filling the vase

Glue green clump foliage or coarse ground foam (small pieces of green foam) to the top of the vase. Trim with
scissors if needed.

Here I've made the flowers using Anita Lahue's method - simply make dots of paint on the greenery. Again, a toothpick dipped in craft paint works very well.
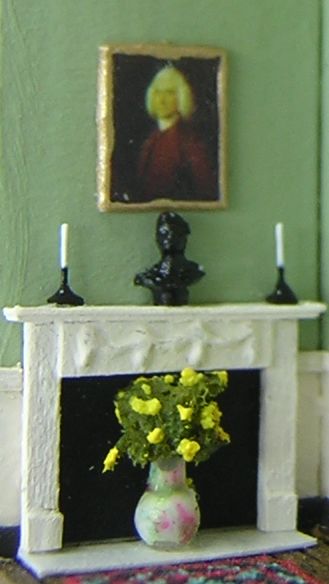
Another flower-making method, which I used on the vase for the Georgian townhouse (shown in the pic to the right), is this: Soak the greenery with Stiffy (fabric stiffener) or a mix of tacky glue and water (it should look like milk). Then sprinkle on brightly colored craft sand, or fine flower foam. Each gives a different effect; on the pic I used yellow craft sand.
If you're not happy with the way your flower arrangement turned out, peel it off the top of the vase and start over with a new piece of greenery.
Leave to dry completely. Then you can remove the vase from the toothpick, scrape the glue remains off its base, and use it in your mini setting.