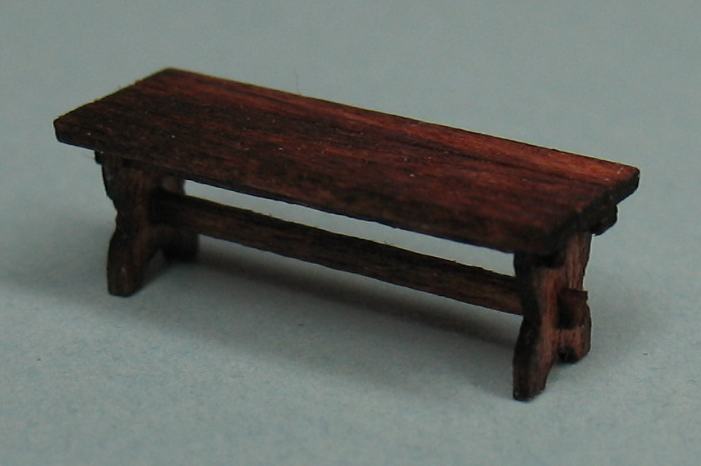
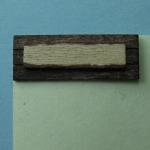
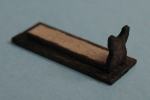
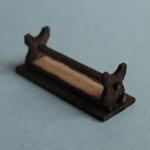
1:144 scale Tudor trestle table
Idea and instructions by Anna-Carin Betzén
Trestle tables like this one were used in the Tudor era. You could use it in a pub, a cottage, a castle, or outdoors. According to the website of the Victoria and Albert museum, trestle tables (with a loose table top resting on a base that could easily be taken apart for storage or transportation) began to be replaced by joined tables (permanently assembled four-leg tables) in the mid-16th century.
Supplies and tools
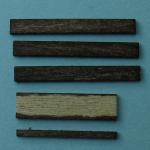
- Scale lumber: H0 2×6 for tabletop, H0 2×3 for stretcher, H0 2×12 for legs. You'll only use a tiny bit for the legs, but you need two pieces that are long enough to get a comfy grip on while shaping it - say 10 cm (4") or more, but not so long that they're unwieldy
- 1×3 mm (1/32"×1/8") stripwood for apron
- Your chosen stain and clear finish
- Tacky Glue
- Chopper (or scalpel or X-Acto)
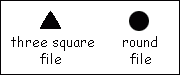
- Needle files - you'll need a three square file and a round file (shown in the sketch to the right)
- Sandpaper
- Post-it note
Check out the Hints and guides section of the site for additional information about the wood types I use,
as well as hints on cutting and using files and finishing.
(For this project, do check out the hints on using files, to prevent mishaps and frustration!)
Trestle table
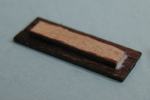
Decide how long you want your table, mine is 15 mm (5/8"). Cut three pieces of H0 2×6 to this length for the tabletop.
Subtract 3 mm (1/8") from the length of the table. Cut one piece of 1×3 mm (1/32"×1/8") stripwood for the apron, and one piece of H0 2×3 for the stretcher, to this length. (IRL this "apron" corresponds to two stretchers, but let's call it an apron to prevent confusion as there's a stretcher piece as well...)
Stain all pieces. The apron can be stained on the long edges only, if you like (that's what I did).
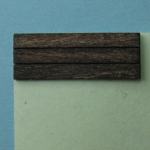
Stick the three tabletop pieces to one corner of the Post-it note, lining them up with the edges. If some pieces have one nice and one ugly side, the nice side should face down.
Spread glue on the apron and center it on the tabletop.
Tip: Give the Post-it a half turn so that you see the tabletop from the opposite side. If it looks just the same as before, the apron is nicely centered. If the apron appears to have "moved", it's further to one side.
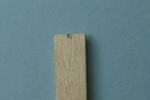
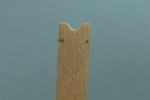
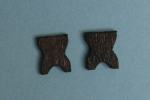
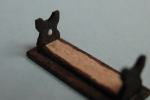
Make sure the end of the two pieces of H0 2×12 is cut straight. Mark the center on one of them.
Using the three square file, make a little groove at the mark.
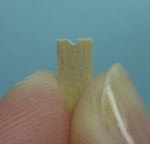
Place the other piece behind it, aligning the edges. Hold them tight, filing with the three square file. Remove the center third or more of the edge (a little more than in this pic). Flip them over once in a while (sometimes both together, sometimes one in relation to the other) to make sure they'll be symmetrical.
Switch to the round file, and use the thin part near the tip to round the V-shaped groove you've made.
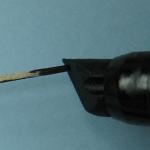
Look ahead to the next step, and if you decide to shape the sides of the legs, mark both edges of one of the strips, about 2.25 mm (a scarce 3/32") from the end.
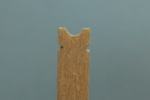
Now you've got to be careful - you'll be filing on the long grain, and that's when things risk breaking. Use short, slow, strokes, with no pressure whatsoever, as described on my page about wood.
Note: If you're scared off by this warning, you can always do without the shaping on the sides of the legs! Instead, you could make the groove on the leg a bit taller and pointed (using a crossing file). Skip past the shaping of the sides of the legs, down to the cutting step below.
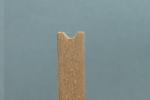
Make a slight groove with the three square file at the two marks. Align both pieces and file a little more so both have the same little groove.
Continue with the round file, ever so carefully.
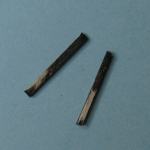
When I got to this step on my first pair of legs, one of them broke.
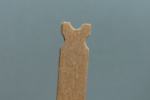
Sand lightly to blend the filed curve with the original edge of the strip.
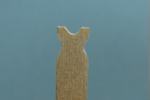
Set the chopper to 5 mm (3/16") and cut off the legs, one at a time.
Stain them.
Take a bit of H0 2×3 and check that the end is cut off fairly straight.
Touch your stain marker or stain-loaded brush lightly to the end for a few seconds, letting the stain soak into the wood.
Cut off a piece, something like 1 cm (3/8") for ease of handling.
Repeat to make a total of two or three pieces. Put them aside for now, they'll be cut into tiny pieces for stretcher ends later. (Only part of each piece is usable, as the further away from the end where you applied stain, the less thoroughly stained it'll be. You could also cut the minute pieces first and then stain, but it's pretty messy!)
Spread some glue where the apron meets the tabletop...
... and stick one of the legs there.
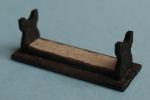
Repeat for the other leg.
Locate the stretcher piece, it's time to glue it on:
Put a dot of glue on the inside of one of the legs, right where the leg is at it's narrowest (if you haven't shaped the sides of the legs, go for about halfway up)...

...and stick one end of the stretcher in the glue, the narrow edges facing up/down. The other end is still loose.
The not yet dried glue will act as a hinge while we position the other end of the stretcher in the next step. (If your glue isn't tacky enough to keep the end in place, wait a minute at a time until the glue has set sufficiently, before you proceed)
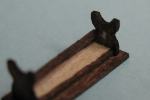
This pic shows the other leg, with the loose end of the stretcher. Apply a glue dot...
...and ease the stretcher in place. Adjust this end if needed, so the stretcher sits at an equal distance from the apron.
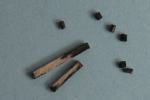
IRL, the ends of the stretchers were stuck through holes in the legs and secured with wedges. In this scale it translates to a blob at each stretcher end. To make wooden 'blobs', cut 6 little pieces from the semi-stained pieces.
Glue three little wooden bits to the outside of each leg, lining up one with the stretcher and the other two with the edges of the apron.
Now your table is finished, set it aside to dry.

Finally, apply the clear finish.