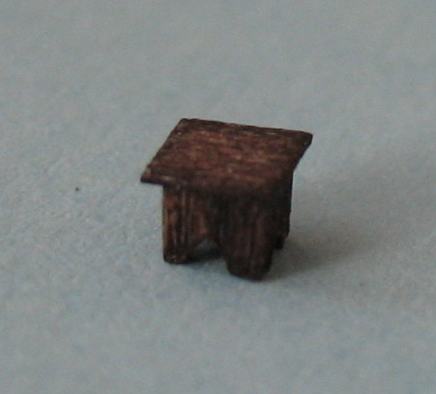
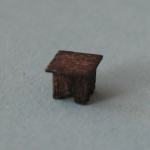
1:144 scale Tudor stool
Idea and instructions by Anna-Carin Betzén
I saw pics of little stools like this in an excellent book - The Authentic Tudor & Stuart Dolls' House by Brian Long. It's a treasure trove of information, filled with photos, sketches and facts, and some 1:12 scale DIY. There, the stool is properly called a cricket or cracket; it's a low stool that young children stood on by the table (instead of sitting on high chairs). Mine is constructed differently though, to make it easier to make in this scale.
Supplies and tools
- Square stripwood; 2.5 to 3 mm square, or 3/32" to 1/8" square, or H0 8×8 or H0 10×10. You'll only use a tiny bit of it, but you need a piece that is long enough to get a comfy grip on while shaping it - say 10 cm (4") or more, but not so long that it's unwieldy
- Scale lumber a little wider than the square stripwood - e.g. H0 1×10 for the smaller ones (2×10 works too if you want a thicker seat), H0 2×12 for the larger
- Your chosen stain and clear finish

- Tacky Glue
- Chopper (if you don't have one, you can use a scalpel or X-Acto instead, but it'll require more patience and care)
- Needle files - you'll need a three square file and a crossing file (shown in the sketch to the right)
The wood dimensions are just suggestions. If you'd like to make a rectangular stool, try e.g. 2×3 mm or 3/32"×1/8" wood instead of a square strip. Adjust the size of the seat accordingly.
Check out the Hints and guides section of the site for additional information about the wood types I use, as well as hints on cutting and using files and finishing.
Tudor stool

Take your piece of square stripwood and make sure the end you'll be working on is cut off straight. We'll start out by shaping the legs, working upside down.
Mark the center of each edge with a pencil; I do it by eye.

On each pencil mark, make a notch with the three square file. Hold the file at an angle as shown, and move it in the direction of the arrow to prevent splintering.
Make a few strokes with the file so you have a clearly defined notch.
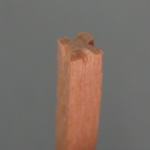
When you've done all four notches, it'll look like this. All that's left of the end surface is a sort of X shape.
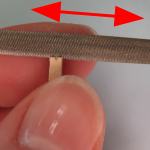
Take the crossing file and join the opposing notches, two by two. Use a gentle stroke back and forth.
I use to rotate the wood a quarter turn after every few strokes. This helps keep it symmetrical - partly because it makes you look at and evaluate the symmetry over and over again. You may want to turn the wood upside down (it.e. turn the stool right side up) to check what the legs look like.
Shaping the legs is actually quicker done than explained!

Continue until you're happy with the look. In the unlikely case that you mess it up somehow, you can always cut off the very end of the wood strip and start over.
Now, set your chopper's guide for a 2 to 2,5 mm (3/32" or a little less) cut. Take a scrap of stripwood and test the chopper setting, making a slight cut into it and comparing the thus marked height to your shaped strip. Does your test scrap look the right height for the stool you have in mind? When cutting the shaped strip, will there be enough wood left at the top, keeping it all together so it won't break into four separate leg pieces? Adjust the chopper and test again if needed.
To cut your stool to height, insert the strip in the chopper and make a slight cut, then rotate it a quarter turn and make another slight cut, and continue all the way around. Then cut through.
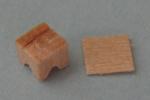
Cut a square seat from scale lumber, it should be slightly larger than the top of the stool so there's a slight overhang on all four sides.
Stain both pieces and let them dry.
Glue the top to the stool.
Apply your chosen clear finish.